Chavde on Ganesh Chaturthi

Ganpati Bappa morya!
Pudchya varshi lavkar ya!


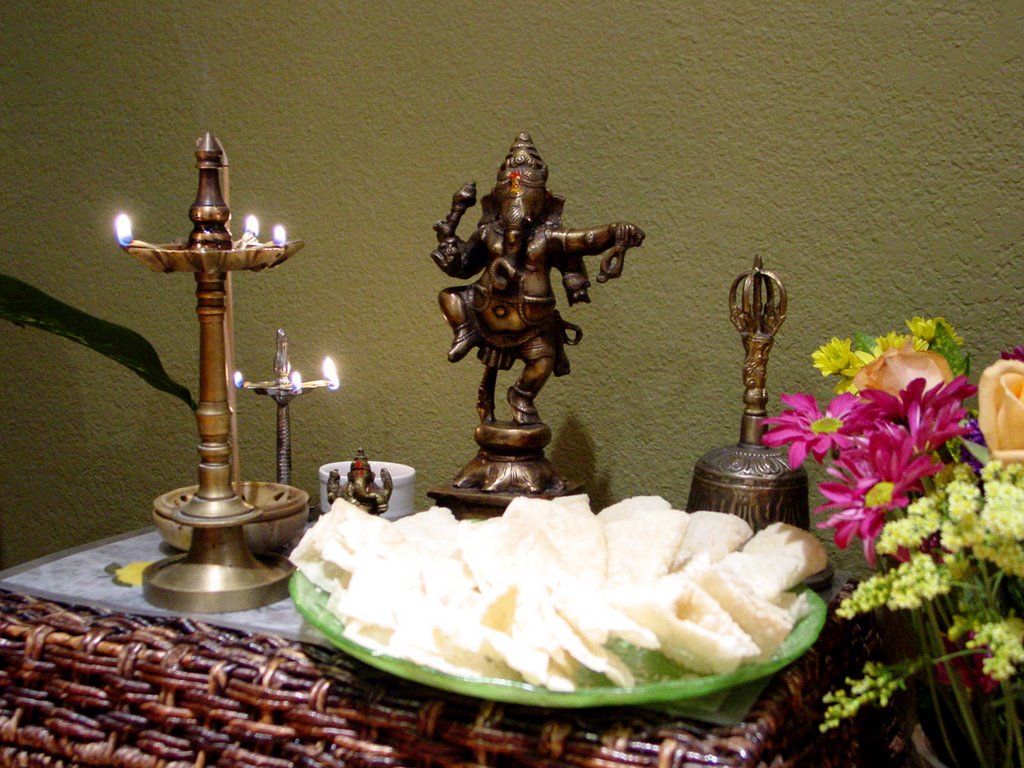
Ganpati or Ganesh is my favorite Indian God. He's full of mischief yet he's the God we seek blessings from before we start new chapters in our lives.

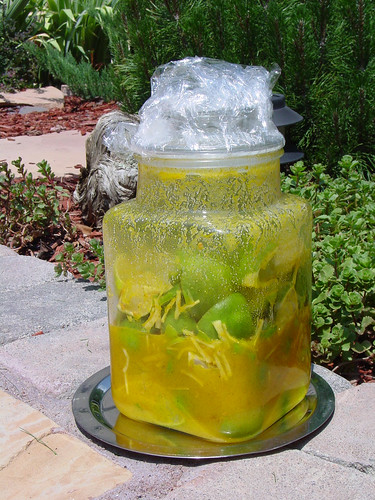
In our family, we didn't really do much for Ganesh Chaturthi. My mother would make modak, karanji and chavde. The last, I think, was for my now Buddhist sister who was born on Ganesh Chaturthi many moons ago. Well, like Mom, I made chavde and they were nearly as good as hers!

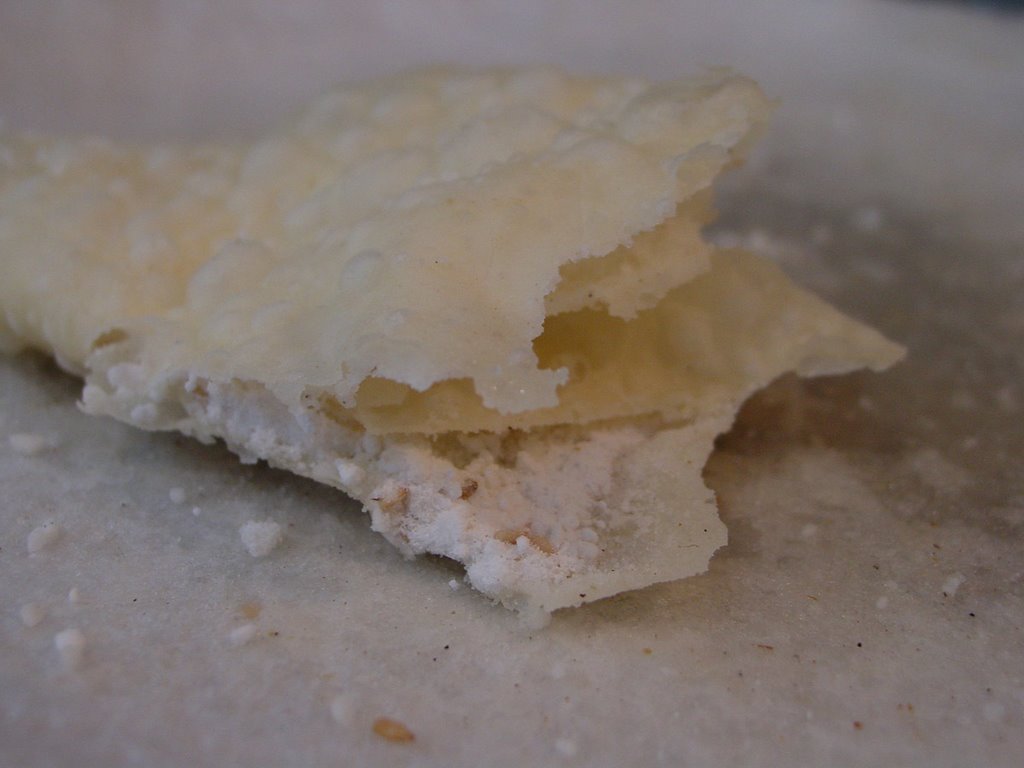
Also known as mande in Konkani, chavde are like a crunchy puri that has been folded over a deliciously sweet sprinkling of sugar, cardamom and coconut powder. This was such a hit that naivedya went for a toss. I consoled myself in the same way my mother did: my family is my God. And, since I am part of that family, I crunched away happily on the chavde before offering them to my favorite pot-bellied God.

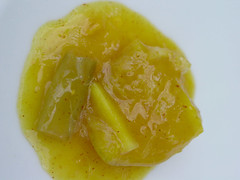
We sang Jai Ganesh Deva and Sukhakharta Dukhaharta and did a little puja. This was followed by a frantic trip to McDonald's to return a Redbox DVD before 7:00 pm. I don't know if they made it in time as I was busy making dinner. Dinner, offered to the Ganpati Bappa first, was waran-bhath, til alu, with lime pickle and, of course, chavda. A little finger was quickly dipped in the lime pickle and I saw it even though my back was turned. But I don't think Bappa really minds...


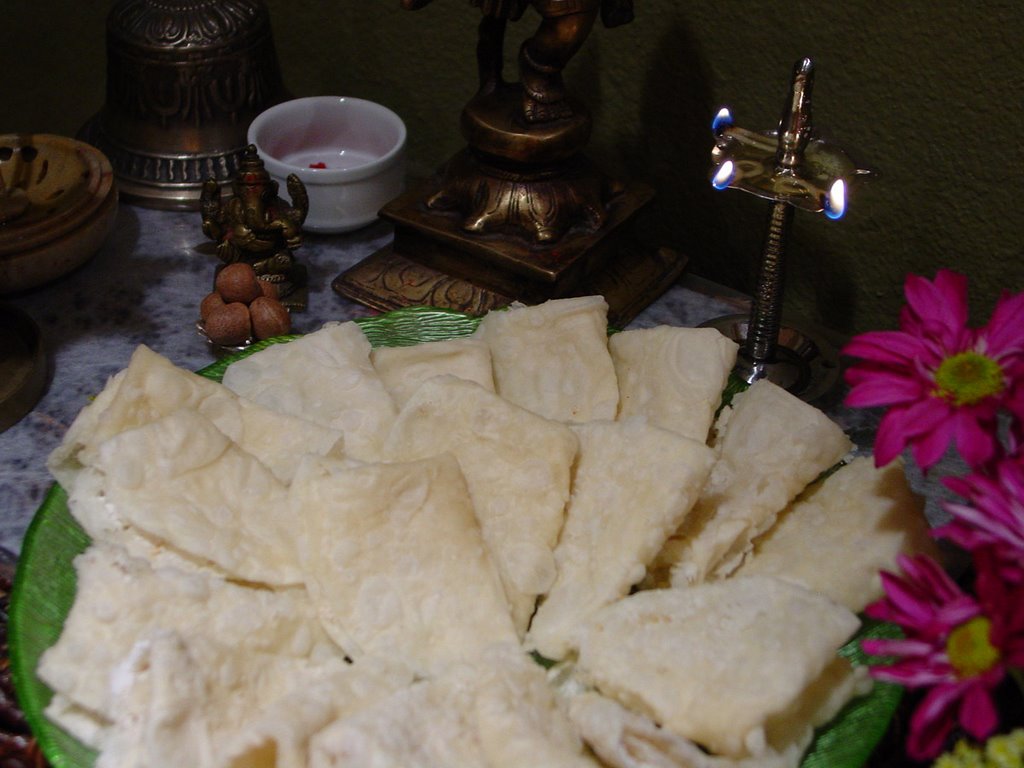
One Chavda, many chavde


My recipe is an adaptation of Shanta's recipe, Shilpa's recipe and what the birthday girl told me over the phone, which in this case, was not very much.
  • 3/4 cup sugar, castor sugar or powdered
  • 3/4 tsp cardamom powder
  • 2 tsp sesame seeds, toasted
  • 3 tbsp coconut powder
  • Oil for deep frying
  • 1 cup maida
  • 2 tsp ghee
  • 1/2 cup milk


  1. Powder the sugar in a coffee grinder if you are using regular sugar.
  2. Mix it with cardamom powder, sesame seeds and coconut powder. Taste the mixture and adjust it to suit your taste-buds.
  3. Heat the oil
  4. Mix the maida, ghee and milk and knead into firm dough. If the dough feels soft or sticky, add more maida till it is very firm.
  5. Make small doughballs about the size of a quarter and cover with a damp paper towel so that the dough does not dry out.
  6. Set up two stations: one to roll out the puris (rolling station), another by stove (deep frying station). Place the sugar mixture by the second station and also prepare a large platter with at least 2-3 layers of paper towels. Also keep an extra paper towel handy. You will need another empty platter for the chavde when they are ready.
  7. Roll out thin puris about 5 inches in diameter. Make them in batches of 10 each, keep them covered with a damp paper towel till you are ready to move to the deep frying station.
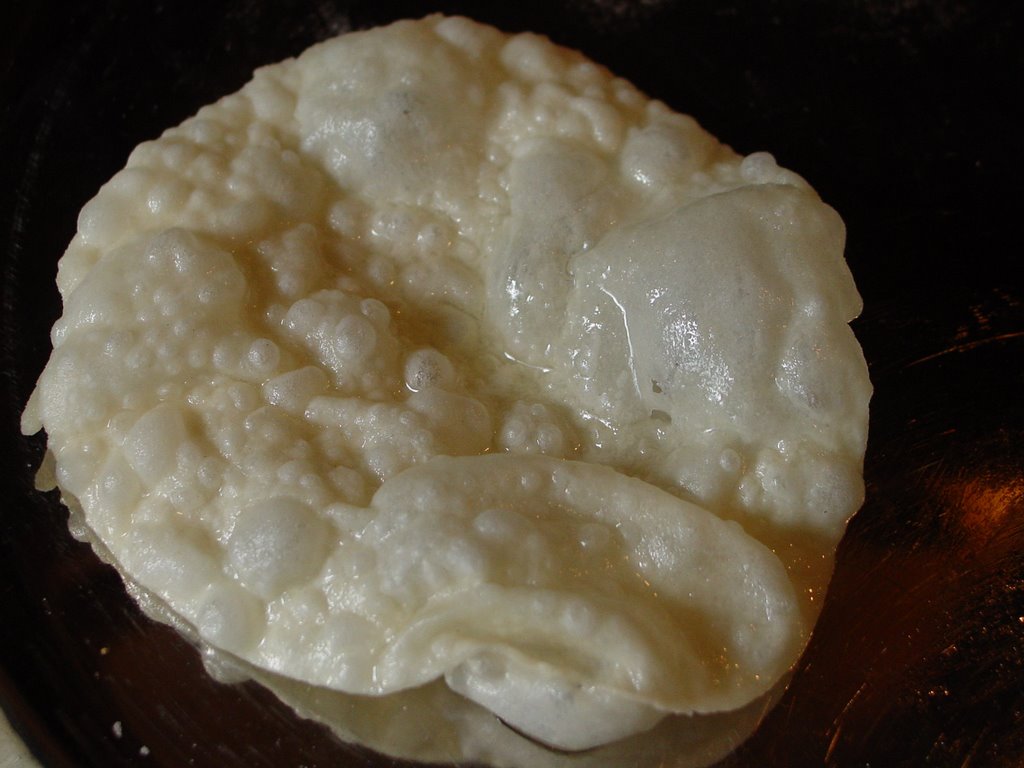
  8. Move to the deep frying station with each batch of rolled out puris and fry a puri briskly in the oil, but not for too long. The puri should be limp and soft when you pull it out of the oil.
  9. The next few steps are where you have to move very quickly as soon as the puri is ready; so make sure that you do this one puri at a time. Place the fried puri on the platter with the paper towels. Use the extra paper towel to dab any excess oil off the puri. This may not be recommended by chavde experts but I recommend it as my puris were dripping oil when I pulled them out.

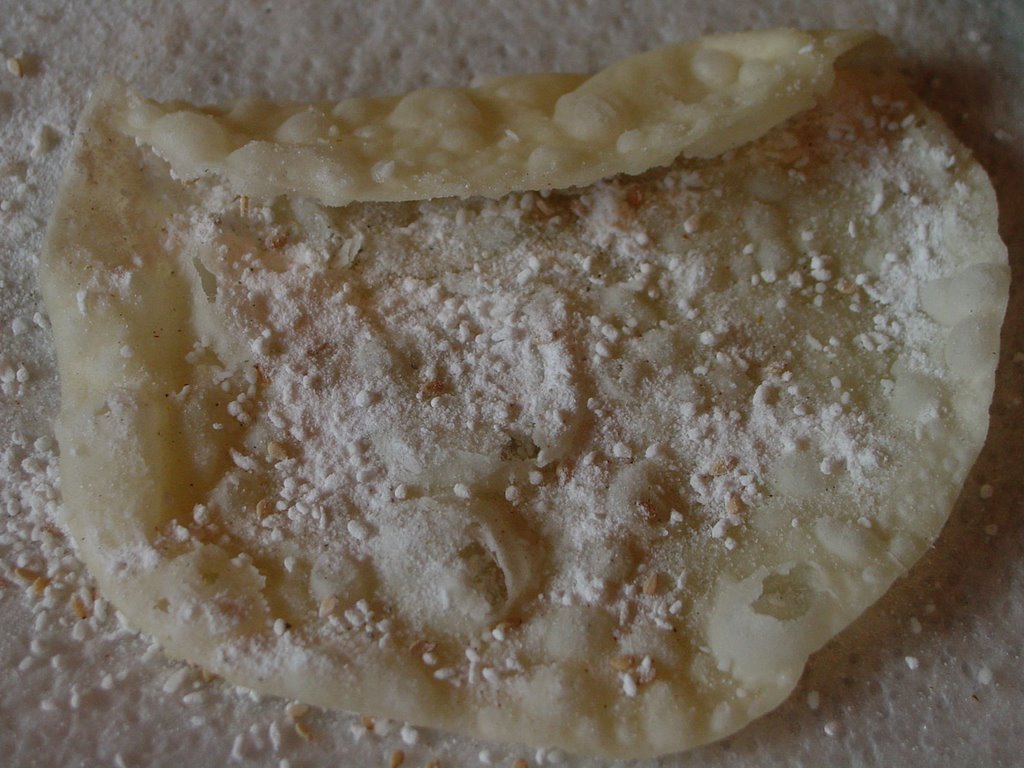
  10. Quickly sprinkle about 1 tbsp of the sugar mixture on the puri.
  11. Fold it about 1/2 inch from the top

    and then in half.

  12. Place it on the platter for finished chavde and allow it to cool. Do not pile finished chavde on top of one another. The puri hardens and becomes crisp as it cools and you don't want to interfere with this process!
  13. If you don't move fast enough, you end up with cracked chavde like so:


I never thought I would ever say: I made chavde!

I did! It wasn't all that difficult once I had the 'stations' set up.

1 cup of flour must have made at least 30 chavde. I didn't get a chance to count as Medha was stealing them from the platter as they cooled and eating them like there was no tomorrow. Then her Dad came in, famished after chopping down my favorite dogwood tree in the yard. I thought both of them might have a problem with the coconut but they loved it so much that I had to stop them from eating them all!

This was our first Ganesh Chaturthi here in Louisville. We celebrated it our own special way: a small puja, a new favorite food, followed by a very simple dinner.

Many Indian food bloggers celebrated Ganesh Chaturthi by making something special:
Shilpa of Aayi's Recipes made modak and her husband has written a wonderful piece reminiscing about Ganesh puja in his home

Asha of Foodie's Hope made besan laddu and cocktail idlis

Sailu made paala undrallu and kudumullu

Others went one step further and made their own Ganesh:
Luv2Cook of Cooking Medley and her friends made beautiful jewel-adorned Ganesh murtis

Mythili of Vindu also made her first Ganesh, displaying extra-ordinary skills at fashioning clay.

Masoor with Red Chard

The day I was enamored by some adorable sunburst squash, I was also smitten by the lovely colors of a leafy vegetable - the red chard.


I've never cooked nor eaten any type of chard, let alone red chard. Here was a beautiful organic bunch of red chard, locally grown at 6000 feet in the Rockies of Colorado. I figured, why not! I'd already bagged the sunburst squash not knowing what I was going to do it; one more in the cart!

Since school started yesterday, I wanted to make sure that Medha's dinner the night before the first day of school was something she enjoys besides being nutritious. Chard is like a two-in-one, the goodness of spinach with the crunch of celery. It is rich in oxalates and vitamins C, E and K. It also has a good sprinkling of potassium.

I sautéed some chard in extra-virgin olive oil with some minced garlic and a dash of lemon. To me, it was delicious but I knew that this was a taste that she was not going to enjoy. It reminded me of the moolyachi bhaji (white radish) my mother used to make - a sharp tart flavor. But, there was a larger problem at hand. Luckily I still had half a bunch of red chard and I had to move quickly. Here's what I made:

Masoor with Red Chard


  • 1 cup whole masoor or whole red lentils
  • 1 green chilli
  • 1/2 medium onion, chopped
  • 3 tbsp oil
  • 3 pieces of cinnamon, 1" in length
  • 15 whole black peppercorns
  • 5 cloves
  • 3 tbsp tomato paste
  • 1/2 bunch red chard, chopped (stalks included)
  • 1 tbsp fresh ginger, grated
  • 1/2 to 1 tsp red chilli powder (optional)
  • 3/4 to 1 cup water
  • salt to taste
  1. Cook the masoor with the green chilli and the chopped onion in a pressure cooker.
  2. Heat the oil and toss in the whole spices: cinnamon, cloves, and peppercorn.
  3. Add the cooked masoor and onions. Pick out the green chilli, if desired.
  4. Add the tomato paste. I used 3 blobs of my frozen tomato paste.
  5. Add the ginger and red chilli powder and cook on medium heat.
  6. Add the chopped red chard, stalks and all.
  7. Add as much water to get the masoor to a consistency you like.
  8. Add salt and cook till the stalks of the red chard are tender but still slightly crunchy.
  9. Serve over rice or with naan, with lime pickle on the side
This was a hit because Medha loves masoor and had several servings with rice and yogurt. She was in bed before 9 pm, looking forward to the first day of school! Now, I'm off to get ingredients for my stuffed sunburst squash.

Mountain Lion Update

We are obsessed with mountain lions around here. And what could be more scary than a mountain lion inside a home?!

When we moved to Louisville, we were told that mountain lions are rarely seen. Then there were sightings in the park close to our home. We were then told that attacks are rare. Then there were a couple of attacks. What next?

Well, the mountain lion actually broke into someone's home!

Medha insists on locking every door in the house at night ever since she saw the video of the cat leaping out of the El Paso man's house.
mountain lion breaks into home

All I can say is Wow! What was that cat thinking?!

More than butter and garlic, please!

No, this is not a 'Guess what this is' post.


It's a 'please help me with ideas' post.


I found these beauties in Wild Oats earlier today. We had enjoyed a great sweet sausage and apple Crispani at Panera and ambled over to Wild Oats in search of organic local vegetables.


I had never seen anything quite as charming as these adorable sunburst squash before. Apparently they are sweetish in flavor and are a delicious summer squash.


Well, I am looking for ideas that go beyond sauté in butter with some minced garlic.


Anyone have any interesting recipes or ideas for me to try out?

Make Lime Pickle (sans oil) while the Sun Shines

While the sun shines? Towards the end of summer?! So what if my timing is off? My lime pickle is ready! It's simply out-of-this-world-delicious! So maybe it's not practical for most folks in the northern latitudes to consider making this now but this recipe for a Lime Pickle, like my Lemon Pickle, is a keeper.


It is very similar to my Lemon Pickle: it is a family recipe, has no oil and is cooked in the sun. It has additional ingredients: green chillies, ginger, and whole fenugreek seeds; and it does not have red chilli powder.

I put this pickle together in the last week of July, knowing that I did not have much time to cook it in the sun. So for those of you who are already experiencing cool nights and nippy mornings, this may not be something you want to consider making this year. Unless you have a window that gets at least 4 hours of bright sun every day. The jar must get very warm for this pickle to cook. My sister who lives in Bombay usually puts this together in December or January.

  • 10 limes, reserve 1 for juice
  • 30 green Thai chillies
  • 3/4 cup julienned ginger
  • 1 tablespoon whole methi seeds, to be added whole
  • 1/2 cup sugar
  • 1/2 cup salt
  • 3 tsp turmeric powder
  • 1 tsp methi seeds, to toast and grind
  • 1 tsp mustard seeds
  • 1/4 tsp powdered hing (asafoetida)

  1. Quarter 9 limes, reserving 1 for juice later, after slicing off the stalk scars. Pick limes with few blemishes and smooth skins. Wash the limes well, making sure that any outer wax has been washed off. Dry well. There must be no moisture on the limes.

  2. Wash and dry the green chillis. Use less if you can't take the heat; more if you want to up the heat! Cut the stem off and cut each green chilli into two.
    green chillies

  3. Wash and dry a 2 inch piece of ginger. Peel it and julienne into slices that are about an inch long. I used about 3/4 cup of julienned ginger.
    julienned ginger
  4. Add 1 tablespoon of whole fenugreek seeds.
    methi seeds
  5. Add the salt, sugar and the turmeric powder.
  6. Toast 1 tsp methi seeds, the mustard seeds and the powdered hing (asafoetida) for 4-5 minutes until the methi seeds are nicely tanned. I got distracted for a minute and mine got sunburnt.
    toasted seeds

    Cool completely and grind them to a fine powder in your coffee grinder or spice grinder and add it to the jar.
  7. Squeeze the juice of 1 lime into the jar. Shake the jar well and set it out in the sun to cook.
    lime-pickle-in-sun

  8. Give it a good shake as you bring it in and put it out every day. Open it once every couple of weeks to adjust it for taste as well as to check to see how well it's cooking.
  9. When the juices have thickened and the peel soft, it's ready. This lime pickle took 4 weeks in the Colorado sun. My sister says it takes about 2 months for hers to pickle completely in Bombay. Let it rest for 4-5 days in a dark and cool place. Then spoon it - a very dry spoon always - into smaller jars and refrigerate to make it last that much longer.

lime pickle


The taste is very different from my lemon pickle. It has a different zing to it. The ginger packs a wonderful punch and the aroma of the green chillies makes this pickle extra special. The methi seeds look like they wanted to begin sprouting but stopped short and are a delight to chew on.

I had to keep Medha at bay every time I opened this pickle to check on taste and just to give it a good stir. She has given her unequivocal thumbs up to this lime pickle! I have been declared the best mother in this whole world - because I make her favorite pickles! First the lemon pickle, now the lime pickle! As always, I am very grateful for the way she looks at life, especially since it is still filled with flattery for me!

The amount of juices released in this pickle from the lime, ginger and the green chillies had me worried. It took a good 15 days of warming in the hot sun before they started to thicken. We had our share of days with near 100F temperatures, but we also had far too many overcast and rainy days. I was worried because I've been warned that too much moisture leads to mold and fungus. But this pickle did really well. Perhaps the green chilli and lime combination helped ward off the evil!