


Yes! I've been busy attending classes. I blame Jen Yu. It all started with her Food & Light Workshop early August. Then my friend Teri signed me up for a canning class through Boulder Valley School District's Lifelong Learning program in September. Last week, I attended a Cooking 101: Cooking Basics class at Whole Foods Market, Boulder.
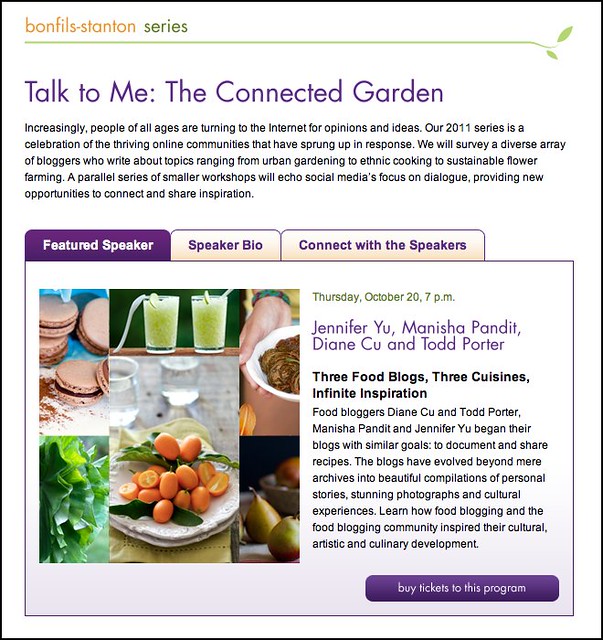
This week, I have another class at the Denver Botanic Gardens, except this time I will be one of the lecturers and demo instructors, along with Jen Yu, Todd Porter and Diane Cu.
Three Food Blogs, Three Cuisines, Infinite Inspiration. That's what it's called! I am both very nervous and very excited! There are two events: a lecture on October 20, 2011 from 7:00pm - 9:00pm and a cooking class on October 21, 2011 from 10:00am - 2:00pm. There are still some spots open, so if you are in the area and you can make it to the lecture or the demo or better still, both, I would love to see you there!
Whole Foods Boulder has been the talk of the town lately, especially after their recent remodel and renovation. Beth Pilar, their Cooking Coach, works the floor helping customers find what they are looking for and even rattles off recipes for exotic ingredients like lobster mushrooms. I was impressed! I attended one of her free Cooking 101: Cooking Basics class and loved the ease with which she teaches in a very dynamic and busy environment. There was lots to learn even though she focused on just three things: Salt, Water and Heat.
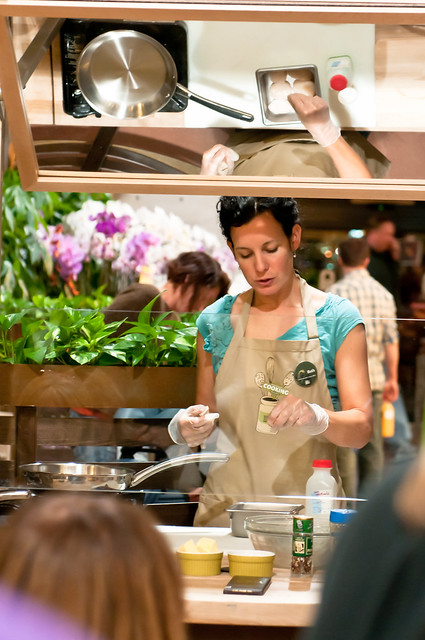
Beth lightly salts some scallops
Some Quick Tips & Thoughts from Beth:
One of my goals for 2011 was to get over my apprehension about canning. I have been reading up for years but I just never had the confidence to do it myself. My friend Teri found a 3-week Canning 101 Class through Boulder Valley School District's Lifelong Learning program held at one of Boulder's middle schools and signed four of us for the class. The class was taught by a former middle-school teacher and chemist, Elizabeth Ritter, who also happens to be a local blogger! Elizabeth's blog, The Simplest Things, is a trove of jams, jellies and other goodies that one can can. If that reminded you of the Rockettes, then wrong reference! What I am talking about is water bath canning at its best!
Elizabeth expertly took us through the basics of water bath canning by showing us the different types of canning methods: raw or cold pack (we made Garlic Dill Pickles) and hot pack (we made Bread and Butter pickles).
Thanks to Teri for finding this class
Aimee
Alison and Aimee

Dawn and the German gal (I've forgotten her name, please remind me!)
In the second session, we made two types of salsa: basic salsa and a designer salsa where we got to pick additional ingredients like nectarines, lime juice, corn, beans, chipotle peppers and so on. I think the only thing I would do different is to use more fresh tomatoes and skip the canned ingredients. It was a little too tomato-y for me. Also my main purpose of learning how to can is to get away from canned tomatoes.
Most cans have a BPA-lining and it leaches into the food, especially tomatoes, because of their acidity. I use a lot of tomatoes in my cooking and as winter approaches, the tomatoes in the supermarket become insipid and tasteless. I turn to canned diced tomatoes and canned tomato paste to bring some flavor back into the food. There are always two large packs of each in my pantry. It's a demon I have been pushing back into the dark recesses of my mind for years now. 2011 turned out to be the year of confrontation.
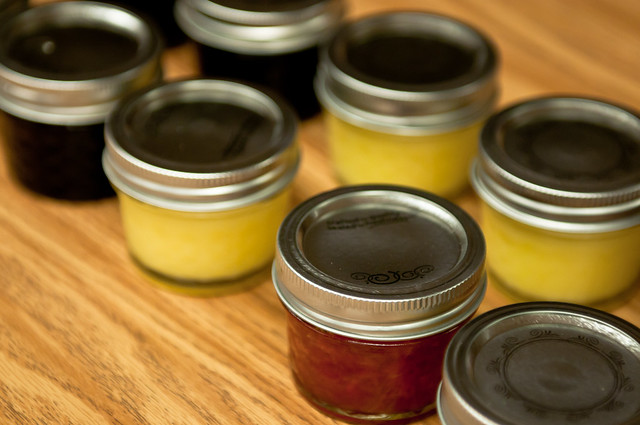
The third and final session was the capstone where Teri and I made blueberry agave jam while the others made lemon curd and strawberry jam.
jam, curd, jam
Dawn brought up the topic of agave nectar and why it is not necessarily very good for you. Kristen of Food Renegade has an excellent article that breaks it down very well. So, oops! Yes, I did choose to make blueberry agave jam and yes, I have recipes on this blog with agave nectar but I am not breaking out into a cold sweat just yet. I don't eat the jam or agave nectar, for that matter, every day. The jam is delicious and the next time I make it, I will use organic sugar syrup, but for now, I will enjoy my jam!
If you have a stash of agave nectar you would like to use up and then never buy again, this recipe is a great way to put it to use. Otherwise, Elizabeth has another recipe that uses honey instead of agave nectar that you might like.
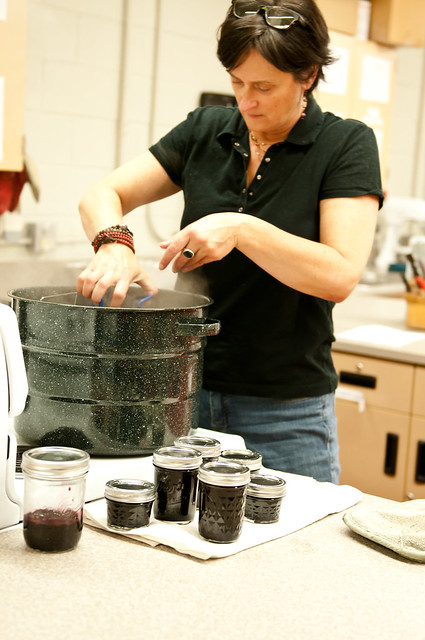
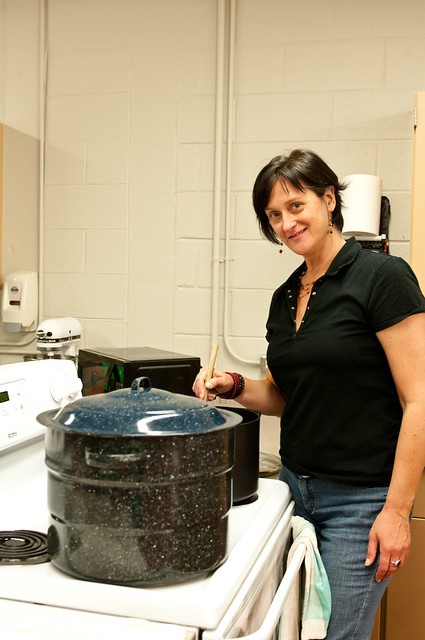
Teri the jar wrangler
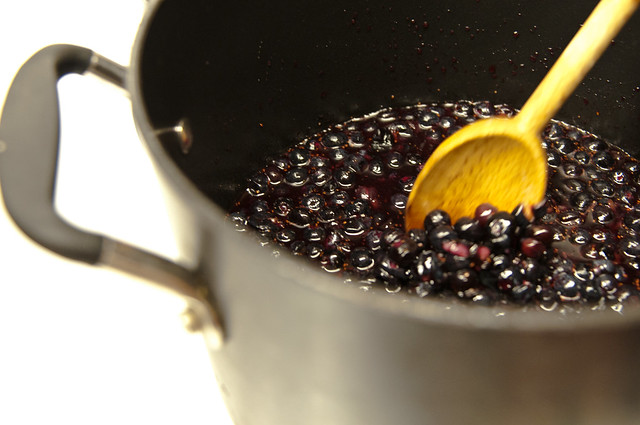
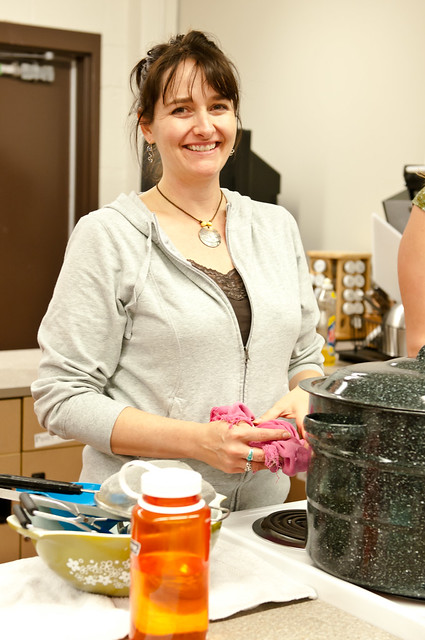
bubbling blueberries
Thank you, Elizabeth!
The canning class was inexpensive at $95 for three sessions, plus $25 for supplies. The class at Whole Foods was free. If you are interested in learning new techniques or strengthening your basic knowledge, look for similar classes in your area. It is a fun activity to do with friends and also, a great way to meet people who have similar interests in food as you.
What classes have you taken or taught lately?
This week, I have another class at the Denver Botanic Gardens, except this time I will be one of the lecturers and demo instructors, along with Jen Yu, Todd Porter and Diane Cu.
Three Food Blogs, Three Cuisines, Infinite Inspiration. That's what it's called! I am both very nervous and very excited! There are two events: a lecture on October 20, 2011 from 7:00pm - 9:00pm and a cooking class on October 21, 2011 from 10:00am - 2:00pm. There are still some spots open, so if you are in the area and you can make it to the lecture or the demo or better still, both, I would love to see you there!
Whole Foods Boulder has been the talk of the town lately, especially after their recent remodel and renovation. Beth Pilar, their Cooking Coach, works the floor helping customers find what they are looking for and even rattles off recipes for exotic ingredients like lobster mushrooms. I was impressed! I attended one of her free Cooking 101: Cooking Basics class and loved the ease with which she teaches in a very dynamic and busy environment. There was lots to learn even though she focused on just three things: Salt, Water and Heat.
Beth lightly salts some scallops
Some Quick Tips & Thoughts from Beth:
- Buy time for the fresh meat you just brought home from the butcher's by unpacking it and salting it right away. Refrigerate immediately. Salt acts as a preservative and keeps the unwanted bacteria at bay.
- When preparing vinaigrettes, add salt to the vinegar as it dissolves best in vinegar than in the final emulsion.
- Even though water is usually not mentioned in recipes, it is one of the most important ingredients and tools in cooking.
- Water conducts energy faster than air (in a heated oven).
- When preparing a water bath for cheesecakes and flans, the water level should be 2/3rds the height of the cooking pan.
- Broiling is akin to upside-down grilling and is used to quickly brown foods, leading to a crisp tender surface while maintaining a moist core.
- Your broiler can be used instead of a kitchen torch to make crème brûlée!
- When roasting, it's a good idea to rub oil into your foods rather than pouring and tossing. Too much oil can result in basting of the foods, leading to soggy rather than crisp roasted vegetables.
One of my goals for 2011 was to get over my apprehension about canning. I have been reading up for years but I just never had the confidence to do it myself. My friend Teri found a 3-week Canning 101 Class through Boulder Valley School District's Lifelong Learning program held at one of Boulder's middle schools and signed four of us for the class. The class was taught by a former middle-school teacher and chemist, Elizabeth Ritter, who also happens to be a local blogger! Elizabeth's blog, The Simplest Things, is a trove of jams, jellies and other goodies that one can can. If that reminded you of the Rockettes, then wrong reference! What I am talking about is water bath canning at its best!
Elizabeth expertly took us through the basics of water bath canning by showing us the different types of canning methods: raw or cold pack (we made Garlic Dill Pickles) and hot pack (we made Bread and Butter pickles).
Thanks to Teri for finding this class
Aimee
Alison and Aimee
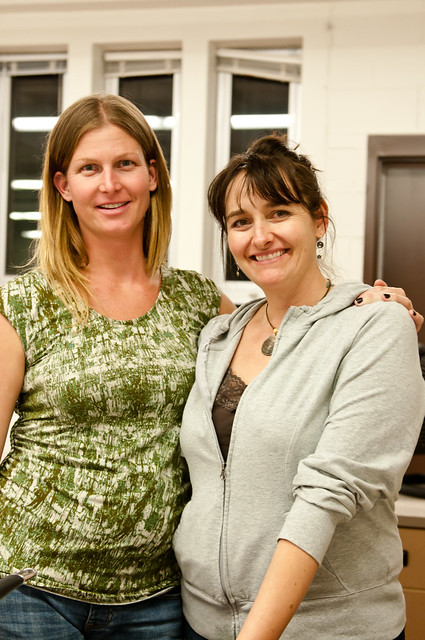
Dawn and the German gal (I've forgotten her name, please remind me!)
In the second session, we made two types of salsa: basic salsa and a designer salsa where we got to pick additional ingredients like nectarines, lime juice, corn, beans, chipotle peppers and so on. I think the only thing I would do different is to use more fresh tomatoes and skip the canned ingredients. It was a little too tomato-y for me. Also my main purpose of learning how to can is to get away from canned tomatoes.
Most cans have a BPA-lining and it leaches into the food, especially tomatoes, because of their acidity. I use a lot of tomatoes in my cooking and as winter approaches, the tomatoes in the supermarket become insipid and tasteless. I turn to canned diced tomatoes and canned tomato paste to bring some flavor back into the food. There are always two large packs of each in my pantry. It's a demon I have been pushing back into the dark recesses of my mind for years now. 2011 turned out to be the year of confrontation.
The third and final session was the capstone where Teri and I made blueberry agave jam while the others made lemon curd and strawberry jam.
jam, curd, jam
Dawn brought up the topic of agave nectar and why it is not necessarily very good for you. Kristen of Food Renegade has an excellent article that breaks it down very well. So, oops! Yes, I did choose to make blueberry agave jam and yes, I have recipes on this blog with agave nectar but I am not breaking out into a cold sweat just yet. I don't eat the jam or agave nectar, for that matter, every day. The jam is delicious and the next time I make it, I will use organic sugar syrup, but for now, I will enjoy my jam!
If you have a stash of agave nectar you would like to use up and then never buy again, this recipe is a great way to put it to use. Otherwise, Elizabeth has another recipe that uses honey instead of agave nectar that you might like.
Blueberry Agave Jam
- 8 cups fresh blueberries or 3lbs frozen blueberries
- 1/2 cup lemon juice
- 1 and 1/2 cup agave nectar
- 3 tsp calcium water
- 3 tsp pectin
Teri the jar wrangler
- Combine the berries, lemon juice and calcium water in a non-reactive saucepan.
- Bring to a simmer and mash the berries, depending on the final texture you want for your jam.
- Simmer for about 5 minutes.
- Add pectin to the agave nectar and stir quickly to incorporate. Pectin dissolves best in sweet mediums. Break up any pectin "pods" with a fork against the side of the bowl and mix into the agave nectar.
- When blueberries release their juices, bring to a boil and continue to boil for 1 minute.
- Add the agave-pectin mixture and stir vigorously for 1 minute.
- Bring back to a boil and test for sheeting.
- Remove from heat and pour into sterilized half cup jars. This makes about 10 half cup jars.
- Process in a water bath canner for 15 minutes at 5000ft above sea-level. (For sea-level, process for 10 minutes and add a minute for every 1000ft above sea-level.)
bubbling blueberries
Thank you, Elizabeth!
The canning class was inexpensive at $95 for three sessions, plus $25 for supplies. The class at Whole Foods was free. If you are interested in learning new techniques or strengthening your basic knowledge, look for similar classes in your area. It is a fun activity to do with friends and also, a great way to meet people who have similar interests in food as you.
What classes have you taken or taught lately?


10 comments:
Wow, very nice experiences and loved those tips by Beth. Thanks for sharing.
I haven't taken any class lately(other than boring work related). Would love to attend something like Cooking 101.
All the best for your talk and demo.
Great tips from Beth. Sounds like a lot of fun. Makes me want to attend a class too :)
I buy fresh fish but I never really salt them.. good tips out there!
I wish i could have attended some classes too .. may be next year.
Wow,..thanks form the tips,..
All the best for your talk, Manisha.
All the best for the Lectures! Wish I could motivate myself to take some classes! maybe when the princeton Wholefoods markets gets into the fray!
loved the tips from Beth!
What a fun and useful class to take! As I wish is the one you are going to give! All the best for that; I am certain it will be great!
Look at you jamming and canning! :-)
So are we going to see a lot of canning recipes now? The salsa sounds delicious!
Good luck with the lec dem - am sure all three of you will be awesome! Thanks for the tips- I always salt my meat as soon as it arrives but didnt know about the vinaigrette. I haven't done any classes recently, but once I'm better I'm plannn to take some classes on cake decoration - it's a major phobia I have!
Miri
dear Manisha, what happened to the Thai cooking that you were learning about a while back ? hope you had a nice birthday. cheers, john k.
Thank you for the best wishes! We had a blast at the DBG lecture demo. Here's the recap with pictures as well as the recipe for onion pakodas that I demo'd there.
John, that Thai class was a one-time home cooking class. It was a 4 hour class that served as a great introduction to Thai ingredients and took away the slight apprehension about fish sauce. And, I had a lovely birthday, thank you! We wandered in the forest near Boulder, got lost and then had tapas and cocktails to celebrate.
Post a Comment