Showing posts with label Veggie Entrées and Sides. Show all posts

In the Mood for Some Garlic

In the recent past, I have had to cook for friends who don't like spices but love vegetables. No spices?! Whatever shall I do? Well, it's not so much no spices as no new-to-them spices, which ruled out any Indian spices. I found an answer in an easy Italian-inspired dish in the Relish pullout of my local newspaper. The recipe called for broccoli and pumpkin but I chose to use acorn squash because it was locally grown and I had never cooked with it before.

Once regarded as a staple in root cellars, kitchens and dinner tables across the country, winter squash has slowly waned in popularity over several decades. We’ve embraced fast food, trendier vegetables, and those that are seemingly easier to prepare.

However, as the sustainable agriculture movement grows, so does the demand for locally grown produce. Savvy purveyors are starting to incorporate more foods typical of the American frontier where squash once played a major role.
From Front Range Living

Gulp! How does one cook this thing?! I didn't have time to look it up on the net so I went with the instructions on the sticker. It said to cut it in half and place it upside down in about 1/4 inch of water and bake for 35 minutes at 400F until tender. Usually the instructions say cut-side down. Which is the 'upside'? The cut side? Or the outside? I went with cut-side down because that is how I had seen pie pumpkins cooked. Turns out that it was the right move. Phew!

The slightly wrinkled ones were done just right. The other two needed a little more time in the oven. I then sliced these along the grooves and cut along the inside of the skin to get thick slivers of cooked acorn squash, that I then diced into smaller chunks. The flesh was more yellow than gold.

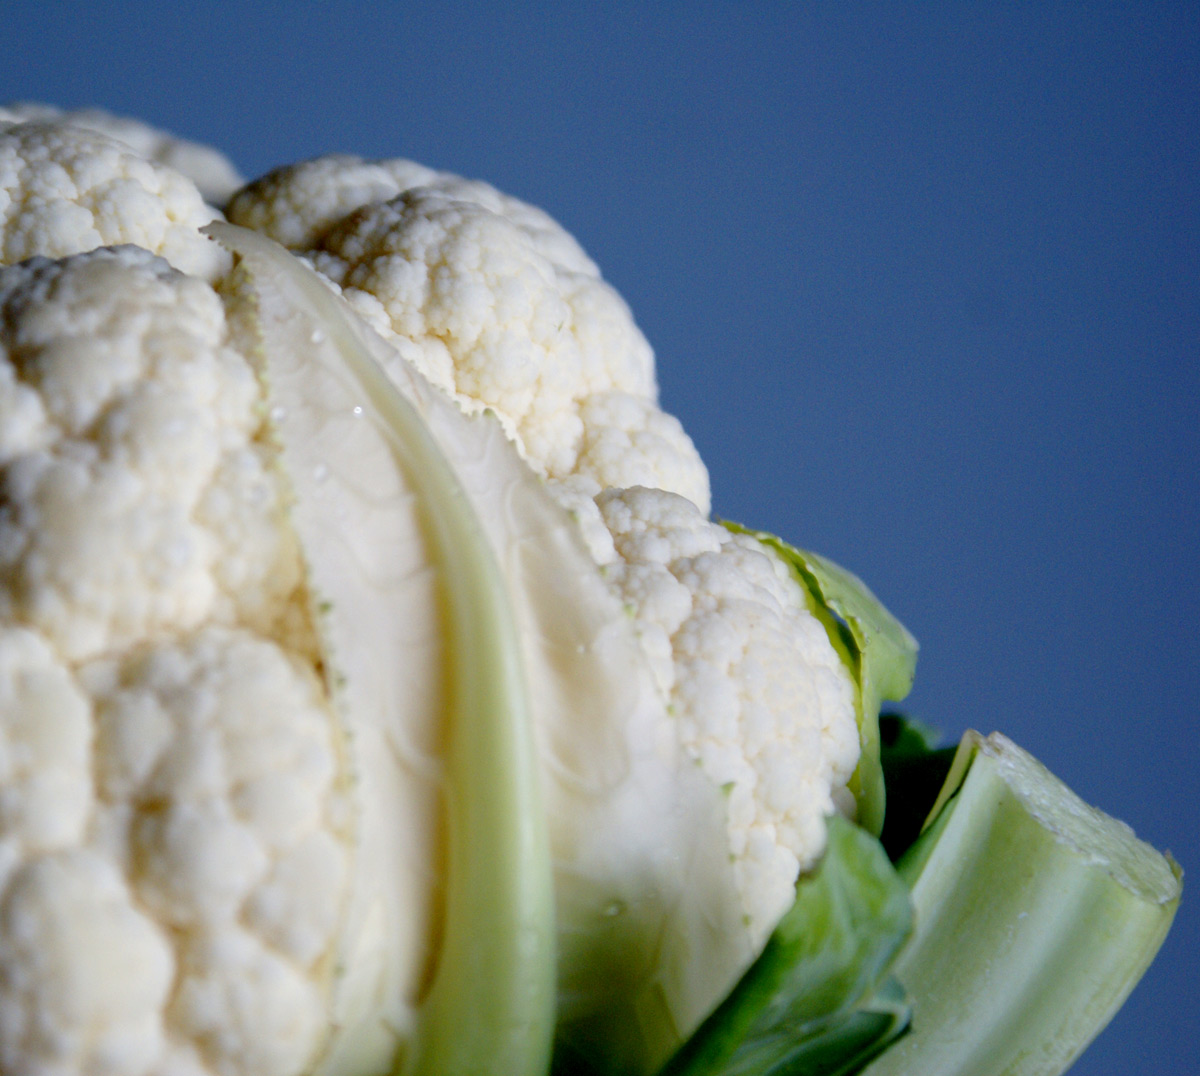
Garlicky Broccoli with Acorn Squash


  • 2 tbsp olive oil
  • 1/4 tsp crushed red pepper flakes (more, if you want to up the heat)
  • 3 cloves of garlic, chopped fine
  • 4 cups of broccoli, largish florets
  • 2-3 cups of acorn squash, cooked and diced
  • 1/3 cup water
  • Fresh ground black peppercorn
  • Salt to taste
  • 1/2 cup cheese of your choice, preferably Parmigiano-Reggiano
  1. Pre-heat your oven to 350F.
  2. Heat the olive oil in a large skillet.
  3. Add the red pepper flakes and heat until the oil darkens in color.
  4. Add broccoli florets and stir-fry on high heat for 3-4 minutes.
  5. Add 1/3 cup water, cover and steam on medium heat for another 3-4 minutes.
  6. Transfer to a baking dish or a dutch oven and sprinkle the chopped garlic over the broccoli.
  7. Add the diced acorn squash, fresh ground black peppercorns, salt and toss to mix well.
  8. Sprinkle the cheese over the veggies and bake at 350F until the cheese is melted.
  9. This will serve between 6-8 veggie lovers as a side at a Holiday Meal.


Notes:
  • For the dish in the picture above, I used a mix of cheeses that I had on hand from the leftovers of the cheese platter from the Secret Santa party. There was no way I was buying more cheese when there was already so much at home. So I ended up with a mix of Swiss, Monterey Jack and Colby Jack. Parmigiano would have been so much better but...and no-one seemed to mind!
  • This dish is high on garlic. My husband insisted that we had a gas leak till I figured out it was the garlic he was smelling! So cut down on the garlic if you can't handle that much but remember that most of it just falls down to the bottom of the dutch oven and it's the flavor that it imparts that you want.
  • This was a huge hit and it's something I will make over and over again. The cheese is not overpowering, the broccoli is just right, and the acorn squash adds a mildly sweet taste, resulting in a rather satisfying dish. Needless to say, I added more crushed red pepper to the leftovers and we enjoyed it even more!


Lower in beta carotene but higher in calcium than other varieties, acorn is not the most nutritive of the winter squashes but provides plentiful complex carbohydrates and few calories.


Sounded really good to me.

Keep this in mind as an alternative to beans cooked-to-death or boiled peas with butter, for meals when you have guests with tender taste buds.

Crawlyflower tales

A few years ago, I found myself staring at luscious cauliflowers in the produce section with wonder and it was only then that I realized that I cooked only with frozen cauliflower. I vowed to change that immediately and placed a gorgeous cauliflower head in my cart. My heart sang all the way home because I knew I would be biting into the fresh taste of that crunchy crucifer that I had been missing all this time.

I set it up on my cutting board with great gusto and started removing all the outer leaves carefully. My father-in-law had told once me that those leaves were edible and quite nutritious but right now I was more interested in the "white curd" of the head. From the corner of my eye, I saw a very plump and very green young leaf move slightly. I turned the cauliflower to address that leaf and the other leaves that were still attached to the head in that area. I cut through the leaf only to see it start to ooze and wiggle like it was possessed.

That green leaf was a humongous green worm, fattened by all the minerals in the vegetable. My husband says I screamed the house down. I don't remember. I just remember curling up on the floor and wishing that the cauliflower and its resident would just disappear.

Needless to say, I had forgotten why I bought only frozen cauliflower. You see if there are a hundred cauliflowers in the produce bin, I pick the only one with worms in it. Such is my luck.

I went back to buying frozen cauliflower until very recently. I still don't care for worms in my produce but I have become more used to different types of worms after attempting to make a vegetable patch in my backyard this past summer. Medha is a fan of worms; she indulges in baby talk with earthworms that she holds her in her palm. She has dangled them in front of my face several times to see if my reaction changes over time; a scientific experiment, she says, to see if the data will change over a period of time. My screams are no longer as shrill as they used to be but my threats have become worse. And How to Eat Fried Worms also helped quite a bit. I sat through it without throwing up.

Cauliflower still remains one of our favorite vegetables and I am glad it does. If properly washed and cleansed of all trails that worms might have left behind, I love to eat it raw. I don't like it cooked or boiled into a soggy mess but I do love it when it's cooked well. Anita calls it al dente; I call it just right or tender but crisp.

There are so many ways in which to cook cauliflower that when my sister wouldn't stop raving about her friend Sushma's mouth-watering recipe, I just rolled my eyes. But she's not one to give up and made it for me when she visited. And I was hooked. It didn't have ginger like most aloo gobi ki subzis do, it had crushed garlic!

Cauliflower Subzi

Sushma's Aloo Gobi


  • 1 medium head cauliflower
  • 3-4 medium red potatoes
  • 2 tbsp oil
  • 2 medium cloves garlic, crushed
  • 1/2 tsp cumin seeds (optional)
  • 1 tsp cumin powder
  • 1 and 1/2 tsp coriander powder
  • 1/2 tsp red chilli powder, adjust to taste
  • 1/4 tsp turmeric powder
  • 2 tbsp tomato paste
  • 1/4 cup water
  • 1/2 tsp garam masala
  • salt to taste
  1. Cut the cauliflower into large florets, about 2 inches in size.
  2. Peel and dice the potatoes into slim chunks, about 1/4 inch by 1 inch. We will be adding the potatoes along with the cauliflower and we want them to cook without having to overcook the cauliflower.
  3. Heat oil in a large saucepan.
  4. Add crushed garlic. Before it browns, add cumin seeds, red chilli powder and turmeric powder.
  5. Take the saucepan off the stove and add cumin powder and coriander powder.
  6. Add cauliflower florets, potatoes and salt. Toss or stir well.
  7. Cover, return to stove and cook on a high flame until the cauliflower starts browning and the potatoes are cooked. Sprinkle with a little water to help the potatoes if they are taking too long to cook.
  8. Also dilute the tomato paste in 1/4 cup water, mixing it well into a thick paste.
  9. When the cauliflower is tender yet crisp and the potatoes have cooked, add the thick tomato paste and sprinkle the garam masala.
  10. Mix well in an almost folding-like action, briskly moving the cauliflower and potatoes from the bottom up.
  11. Cook for another 5 minutes, uncovered.
  12. Garnish with cilantro and serve hot with parothas or rotis and yogurt.


Notes:
  • I like to add some chopped green chillies towards the end for an added kick.
  • Any fragrant garam masala will do. If you would like to make your own, try this garam masala. Or you could use a store-bought garam masala. It's always better to make your own because you are sure you are using the choicest ingredients but not everyone has the time or the energy, in which case I think it's perfectly alright to use store-bought garam masala.


It look like it's raining cauliflower on the food blogs and that, too, without an event! I think it may have to do with it being a winter vegetable, with the growing season ending towards the end of October and even end of November in some places. Here are some of the mouth-watering recipes posted in the last couple of weeks:
Anita's Sookhi Aloo Gobhi
Ashwini's Gobi ka Kheema
Indira's Aloo Gobi with Kasuri Methi
Nupur's Spicy Cauliflower Soup


And now it's time to whoop a bit, do some virtual cartwheels and while I am at it, I might as well fly down a ski slope, too! I'm celebrating 30 consecutive days of posting, as part of NaBloPoMo. It was a lot of work and challenging at times but I did it! I did it!

I found some great local blogs, made some wonderful new friends and connected with several other bloggers. I hope to have a list of these blogs up soon!

Yay me!! And yay to all my NaBloPoMo friends and writers who wrote every day through the month of November! And yay to those to who joined in late and wrote with as much fervor!

For those of you, like Sandeepa, who want "nice" stuff to read everyday, I have some bad news. My blog will be going silent for at least a week while I try and rest those tired fingers, get some much needed sleep and catch up on my life! And you may not place bets on how long it will last! At least a week. Well, maybe a week. Or...

Papeta par Ida

There are days that seem to never end. Today was one of those days. It become excruciatingly so when I realized that I had put it off too long and I really did need to buy Medha some new pants. She's been going around looking like a tangewali. When used to describe someone who has nothing to do with a horse, it means that their trousers or pants are too short. At least, that's how it's used in my family! While we waited for her Science Project pictures to be printed out, we went to the Kohl's next door to remedy this terrible oversight on my part. In less than a half hour, armed with several fleece pants that she needed and matching jackets that she didn't need, we joined the line at the cashier. One woman was being served, next in line was a woman and her daughter and then us. 10 minutes and our status hadn't changed. It was the same story in the other lines else I would have jockeyed to another cashier. Another 10 minutes and Medha couldn't bear it anymore.

Let's go, Mumma! I don't care if my pants are short! I have enough for this week. Maybe we can do this another time.

Ah! I have raised her well! I threw the clothes down and walked out of there, hand in hand with my daughter. Both of us feeling immensely relieved! How do they do it?! I mean on a weekday, a schoolnight? How do they shop for teeny tiny stuff that no-one needs? Stuff that will be put away in a drawer or returned? Just because it's on sale?!

We were so hungry that we stopped to eat some overly processed but delicious and juicy kosher hot dogs at Sam's, picked up our photographs and came home! What I really wanted to eat was papeta par ida - eggs over potatoes - but there was none leftover from the batch I had made on Sunday.

Papeta par ida, also pateta par ida, is a Parsi dish that is quite like a fritata - spicy potatoes that have been doused with well-beaten eggs. I've had this for breakfast, brunch and lunch at a Parsi friend's home so I am not entirely sure when this is served. We usually make a brunch out of it as it is very filling and rather satisfying! A Parsi friend of mine had once told me that my papeta par ida was as good as her mother's!

Papeta par ida

Eggs over spicy potatoes


  • 4-5 medium red potatoes, diced into 1 inch pieces
  • 2-3 tbsp oil
  • 1/2 tsp mustard seeds
  • pinch asafetida
  • 2 small Thai chillies, chopped into two pieces each OR 3-4 long finger hot chillies, chopped into 1 inch long pieces
  • 6-7 kadipatta leaves
  • 1/4 tsp turmeric powder
  • 1 tbsp grated ginger (optional)
  • salt to taste
  • 1/4 cup finely chopped cilantro
  • 3 whole eggs and 3 additional egg whites

  1. Heat the oil in a saucepan.
  2. Add mustard seeds and when they pop add asafetida, followed by the chillies, kadipatta, turmeric powder.
  3. Then add the diced potatoes and some water, if you decide to use less oil.
  4. If you are using ginger, add that too. Followed by salt.
  5. Cover and cook on a medium flame until the potatoes are done.
  6. Sprinkle the chopped cilantro all over the potatoes. Mix it in if you wish. I like to leave it on top.
  7. Add salt to the eggs and beat till they are nice and fluffy and pour into the saucepan.
  8. Cover for a few minutes to allow the top layer to cook.
  9. When the eggs have set, your papeta par ida is ready to be served!
  10. Serve with toast, plain parothas or naan.

Notes:
  • Take as many potatoes as you will need to make a nice layer of potatoes in your pan. I usually take one extra potato cos I lose about as much while they are cooking. Like so:
  • If you would rather use 6 whole eggs that really is up to you. I usually take one whole egg and one egg white per person - yes, Anita, that extra yolk goes down the drain.
  • The other famous version of this Parsi dish is bhida par ida or bhida par idu. Eggs over spicy okra which is also very addictive.


We usually cut this up into quarters, with one quarter reserved for the hungry little girl as a quick healthy after-school snack.

Sambar with my eyes closed

Mumma, will you please write down this recipe? So that when you're dead, I will still know how to make this?

A compliment, I think!

Perhaps it comes from all that talk about my Mom's nankatai, not knowing which recipe was the one she used and how the only way to figure it out was to try both and hope that one of them was it. Either that or it's the prolonged morbidity that has prevailed in our conversations lately!

So many bloggers start their blogs as a legacy of recipes and memories for their children. Others because they hit a wall looking for accurate pictures and descriptions of ingredients and homemade Indian food. Many others use it as a tool to share memories with family and friends far away. Me? I wish I had something even remotely as endearing. But no, I just wanted to figure out how Blogger worked. This was back in March of 2003, and food & family was the easiest topic to blog on. It didn't matter whether anyone would ever read what I had to say, I just needed to figure out what the hype was all about.

I've never really conformed and our life path after marriage certainly hasn't either. However, once there was a child in the picture, a lot of things changed because we didn't want our child to bear the brunt of our lifestyle. But she remains different as do her thought processes, shaped as she is by our attitudes and outlook. Sometimes, a tad too mature for a 9 year old. Other times, too naïve.

So when she asked me to write down the recipe, I wondered whether that could be the new meaning of my blog. And my inner core shuddered. But, like I said, when there is a child or there are children, one's perspective changes. I don't know that my entire blog or all the recipes, anecdotes and thoughts are for her - it's really for me and it's perfectly alright to be selfish on some fronts, I think - but this recipe is definitely for her. As is the backup of all my recipes. My blog, though, remains mine and a release for me and me alone.

One Pot Sambar

  • 2 tsp oil
  • 1/2 tsp mustard seeds
  • pinch asafoetida
  • 1/4 tsp fenugreek seeds
  • 1/4 tsp turmeric powder
  • 1 Thai green chilli or 2-3 finger hot pepper, sliced vertically into two
  • 2 sprigs of kadipatta
  • 1 red chilli, broken into 2 pieces (optional)
  • small ball of tamarind fruit pulp, about the size of a dollar coin
  • 1 can of Hunts organic diced tomatoes
  • 1 cup tur dal (split pigeon peas)
  • 3 cups water
  • 3 heaped tsp MTR Sambar Masala
  • salt to taste
  • cilantro for garnish, optional


  1. Heat oil in the pan of your pressure cooker
  2. Add mustard seeds and when they pop, add a pinch of asafetida, followed by fenugreek seeds.
  3. Add green chillies and kadipatta. Be ready with a splatter screen if these are wet or damp.
  4. Add the turmeric powder and the red chilli, followed by the diced tomatoes. Add about 1 can of water, too. This way the can gets rinsed out, too!
  5. Add about 1/4 up to 1/3 cup water to the tamarind fruit pulp and heat it in the microwave for about 10-15 seconds. Mash the tamarind pulp till you have a thickish paste. Discard any fibers or seeds. Add more water if needed.
  6. Wash the tur dal in a couple of changes of water and add it to the pressure cooker, followed by 3 cups of water, tamarind paste, MTR sambar powder and salt.
  7. Cook under pressure for at least 3 whistles. Sometimes I forget and let it go to 4 without any problems! Or cook for as long as it takes for tur dal to cook in your pressure cooker.
  8. Allow the pressure cooker to cool before you open it. Remember that it is still cooking in the built up pressure and you want to make the most of that. Plus it is wise to be safe.
  9. Stir well, adjust for salt and sambar powder, if required. If it is too thick for your liking, add more water and adjust the seasonings again.
  10. Garnish with cilantro and serve hot with rice or idlis or dosa.


We love this sambar so much that we can be found sipping on it, rather like soup. It's quite perfect for this cold weather!


Notes:
  • If you aren't sure if 3 tsp of MTR's Sambar powder is the right amount for you, start with 2 tsp and once you have opened the pressure cooker, do a taste test to see if you need more. I used only 2 teaspoons until recently as Medha could not handle the spice.
  • I have used a lot of sambar powders, and made my own, too. But for a quick sambar, I think MTR wins in taste and flavor. MTR spice mixes can be found in any Indian grocery store. Remember that you want the Sambar Powder and not the Instant Sambar Mix. Avoid the latter!


If you don't yet have a pressure cooker, I would exhort you to consider buying one as a Christmas gift for yourself. Think about it: it takes 20 minutes to cook something that would otherwise take at least an hour, if not more. It's taken me almost 2 hours to cook 2 cups of dal in a stockpot in Boulder, which is over a mile high in altitude. So much fuel and time wasted, not to mention the added frustration. You can cook directly in the pressure cooker or you can get inserts or containers that fit in the pressure to place different items. Target and Kohl's have pressure cookers in their cookware aisles or you could buy online from Amazon. I have only recently started cooking meat in the pressure cooker and it's so tender that I wonder what that mental block was all about! At least give it a thought!

Update: I am sending this to the lovely Linda, who is the host for JFI: Toor Dal.

Curry that Pumpkin

We woke up to Jingle Bells on Saturday morning. It was bad enough that I was squashed between two people who I could not out-snore. Then to wake up to Christmas music, in the middle of Diwali, while it's still Fall, now that's outright blasphemy. Add to it the misery of not being able to find the remote to turn the darned thing off! And when I found it, it was yanked from my hands: Mumma! It's Christmas music! They're playing Christmas music! Jingle bells! Jingle Bells! Jingle all the way! She then proceeded to dance through the house, turning on every device that had a radio. I was not sure which was worse, the music or a chirpy person first thing in the morning.

It took me a while to get used to Christmas music the day after Thanksgiving. It may be hard to believe but I actually love Christmas music. Especially Christmas carols. But I get sick of it when that's the only thing playing on the radio. Now I have press all the buttons on my Bose and hope to set the alarm to another radio station. I sleep through the beep-beep-beep-beeeeeeep, all 90 seconds of it. I never hear it because it is predictable. Radio is different. It could be a song that brings back memories leading to a warm morning snuggle, it could be the talk-show host being her annoying self, it could be a bad commercial, it could be the weather or the news or traffic on I-25. It's never the same thing at that exact time every day.

But Jingle Bells before Thanksgiving? I mean come on! There are still so many leaves on the trees!
Dogwood tree, November 13, 2007

And, there are all those pumpkins to cook! Pumpkin becomes slightly sweetish when cooked and therefore complements spices very well. There is a lot that can be done with pumpkin apart from Pumpkin pie and pumpkin soup. Try making this pumpkin and potato curry. We love it!

Pumpkin and potato curry

Bengali Kumror Chakka

  • 1 small pie pumpkin, chopped into small cubes
  • 5-6 medium potatoes, cubed to same size as the pumpkin
  • 1-2 tbsp oil
  • 1 tsp panch phoran
  • a pinch of hing
  • 1 dried red chilli, broken into two pieces
  • 1 tejpatta
  • 2 inch knob of ginger
  • 2 medium size cloves of garlic
  • 2 green chillies, sliced vertically and seeds discarded
  • 1.5 tsp jeera powder
  • 1.5 tsp coriander powder
  • 1/2 tsp red chilli powder (optional)
  • 1/4 tsp turmeric powder
  • 1/2 tsp garam masala
  • 1 tsp amchur powder
  • salt to taste
  • some chopped cilantro, for garnish


  1. Pound the green chillies, ginger and garlic in a mortar and pestle into a corase mixture.
  2. Heat oil in the pan of your pressure cooker.
  3. Add the panch phoran and when it splutters, add hing, then red chilli pieces and then tejpatta.
  4. Then add the pounded mixture of green chillies, ginger and garlic.
  5. Add the potatoes and the pumpkin and stir.
  6. Mix all the dry spices except for the amchur powder with a few teaspoons of water to make a paste.
  7. Add this to the pan and stir well. Cook for a few minutes till you can smell the fragrance of the masalas start to waft through. About 3-4 minutes.
  8. Add 2 and half cups of water and cook under pressure until the first whistle or its equivalent.
  9. Allow to cool till you can open the pressure cooker without hurting yourself. Add the amchur powder and mix well. Then add chopped cilantro leaves and serve with naan or roti or paratha.

Note:
  • If you don't have panch phoran, don't fret. Take 2 pinches each of mustard seeds, fenugreek seeds, nigella seeds, cumin seeds and fennel seeds. You can buy pre-mixed panch phoran in the stores but I find it unnecessarily expensive when I can put it together in a jiffy as I usually have all these seeds in my pantry.
  • The long list of ingredients may seem daunting but it's just a question of organizing yourself to have these things ready before you start cooking. And they are everyday spices. Maybe not panch phoran for many of you but you will find that once you have used panch phoran, you will start looking for more recipes with this fragrant mix of seeds.
  • I have adapted this from the original recipe that was posted here by the lovely Sangeeta. I have increased the amount of pumpkin and potatoes and reduced the level of spice. This seems to work very well for us, especially now that Medha can handle a little more spice than before.
  • Be careful while cutting that pumpkin! Cut your pumpkin first and then figure out how many potatoes you will need. You want as much pumpkin as potatoes.

It looks like I am not the only one in the mood for savory pumpkin dishes. Be sure to check out:
ISG's Pumpkin Parathas
Madhoo's Red Pumpkin Curry
Happy Cook's Pumpkin and Potato Soup
Anita's Baakar Bhaji
Srivalli's Gummadikaya Gojju
Richa's Butternut Squash

I am sending this in to Kalyn's Weekend Herb Blogging which is being hosted by Vanessa of What Geeks Eat.

Ancient Cuisines: Mohegan Succotash


The word 'succotash' comes from the Northeastern Narraganset Indian word "Msickquatash" which means "a whole ear of corn."

Spirit of the Harvest, North American Indian Cooking by Beverly Cox and Martin Jacobs

There are many variations of succotash. The Pennsylvania Dutch, who are really of German origin, make this with milk or cream. Some recipes have bacon, fish or meat. It is quite understandable why succotash was a very popular dish during the depression.

Mohegan succotash is slightly different from other succotash recipes - the corn is left on the cob. And that is something I love! Once I have eaten the corn off the cob, I love to dip the cob back into the sauce or the juices and suck and chew on the sweet cob. Fresh succulent veggies in butter is what this dish is all about. It has a wonderful earthy flavor with no seasoning that many might mistake for bland.

Mohegan Succotash


  • 3-4 ears of fresh sweet corn
  • 1 packet frozen lima beans
  • 1 and 1/2 cups water
  • 2 tbsp vegetable oil
  • 1 bunch spring onions, sliced
  • 1 green bell pepper, seeded and diced
  • 1 red bell pepper, seeded and diced
  • salt and pepper, to taste
  1. Clean the corn of its husk, silk and fibers. Cut the cobs into pieces that are about 1-2 inches in length. You will need a very sharp knife to do this or you culd end up hurting yourself!
  2. In a large saucepan, add oil, lima beans, water, salt and pepper. Cover and bring to a boil over high heat.
  3. Reduce heat to medium-low and simmer for another 10 minutes
  4. Add the green onions and peppers. Simmer while covered for another 6-10 minutes until the beans are tender. The peppers should be tender yet crisp.
  5. Remove lid and cook over high heat for 3-4 minutes until the liquid is reduced to about 1/2 cup.

I prefer to skip the buttery flavor (1/4 cup butter) and use just a little bit of vegetable oil instead. The original Mohegan recipe calls for bear grease instead of butter, so I am just taking it one step further in substituting it with vegetable oil. In fact, the oil is something I could skip completely. Vegetable stock or chicken broth could also be used.

Succotash is unbelievably satisfying. For this versatile recipe, use your favorite vegetables when you want to be seduced by their inherent flavors. It is something I relish when my body calls for a systemic cleansing of spice overload. It is almost detoxifying in its effects.

I served this with Ute Tortillas and Pueblo Chicken.

Turn it On!

It's been 33F every morning this past week, and dark when I drag myself out of bed. The temperature in the house dips to 62F and slowly warms up to 64F by the time Medha leaves for school. Turning on the furnace would help but the resident furnace cleaner is very reluctant to indulge in this particular activity. And in summer, he has the same feelings about turning on the air-conditioner. I couldn't bear it anymore the other day and I did the unforgiveable - I asked for the furnace to be turned on, oh please! A little voice piped up: But, Mumma, what about the Earth? Don't you want to save it? Of course, I do! I pontificate on it at every opportunity I get. So I wore all my ski gear, made some coffee instead and dug out the little heater.

Medha's room is very warm. Mine is a freezer as it gets buffeted by the winds. So I get the heater until I am warm under several layers of comforters.

It was 40F this morning but very blustery. A little person crept into my room and asked to wear my slippers as she could not find her own. Oops! Then she said: I really want to save the Earth and, I know my room is warm so I really don't need the furnace at night. But, the rest of the house is so cold that when I wake up in the mornings, I have hypothermia. Daddy, could you please turn the furnace on?

It didn't work.

It warmed up to a sunny but windy 70F today and it will probably be the same tomorrow. Sunday's high is going to be 39F with rain and snow. That's the high. The low will be 29F and it will feel much worse inside the house. I think I need a petition to get the furnace started by Saturday night!

Tonight is the Pom Cheer Night. We are going to freeze some more as we watch Medha and a whole bunch of young girls, aged 5 to 10, do the cheer at the high school football match. I've never been to a football game and I really hope those bright lights generate some heat! Brrrr! After that, we head to a friend's place for Navratri celebration. We will miss the puja but be just in time for pav bhaji. Yum!

When it's cold like this, I yearn for comfort food. A soupy something like Nabeela's Marag is just perfect! But given the deadlines at work, I need it to be quick as well. So last night, I reached out for Ammini's Grains, Greens and Grated Coconuts and made Cheera Udachathu. With plain steamed rice, I reached my Nirvana and did not worry about the underlying problem with the furnace cleaner.

And, yes, spinach is very popular in this household. It's healthy, it's delicious and it's also a great alternative to Metamucil!

Cheera Udachathu

Spicy Mashed Spinach


  • 1 lb baby spinach leaves, washed
  • 1/4 cup water
  • 1/8 tsp turmeric powder
  • Salt to taste
  • 1 tsp fenugreek seeds
  • 2 tbsp vegetable oil
  • 1 tsp mustard seeds
  • 1 tsp urad dal
  • 2 dried red chillies, halved or 2 green chillies, sliced vertically
  • 12 to 15 fresh curry leaves
  1. Bring 1/4 cup water to boil in a saucepan. Reduce the heat, and add the spinach to the
    pan.
  2. Add salt and turmeric powder. Cook over medium heat until the spinach wilts completely.
  3. Drain the excess water and reserve for vegetable stock or to knead the dough for rotis and parathas. Let the spinach cool, then blend it
    to make a thick, smooth purée.
  4. While the spinach is cooling, toast the fenugreek seeds over medium heat in a small skillet. Remember that dry roasting enhances the flavor and reduces the bitterness of fenugreek seeds. However, fenugreek needs close attention while toasting; it turns reddish brown and tastes very bitter when over-roasted!
  5. Using a mortar and pestle, crush it into a coarse powder. Or if you prefer, grind it to a fine powder in your spice grinder.
  6. Heat the oil in a skillet, and add the mustard seeds. When the mustard seeds start popping, add the urad dal, the green chillies and the curry leaves. Fry until the dal turns golden.
  7. Transfer the puréed spinach to the skillet. Sprinkle the toasted fenugreek powder on top, mix well, and cook for another minute or two.
  8. Cover and set aside for ten minutes, to allow all flavors to meld.
  9. Serve hot with plain boiled rice.


This is a very easy and quick curry to put together. You can increase the spicyness by adding more green chillies or dried red chillies, if you wish.

This recipe, and many more easy to make recipes, can be found in Grains, Greens and Grated Coconuts by Ammini Ramachandran. I keep going back to this cookbook over and over again for heart-warming recipes.

Thank you, Ammini!

IFR Quick Fix: Patal Bhaji

I know what you are thinking: she accepted the Schmooze award and promptly did an about turn and became an UnSchmoozer. Well, not true. If I had hogged the Schmooze Award, polished it, displayed it, gloated over it and then morphed into a turncoat, some of that earlier statement might be true. But I shared it with a go forth and multiply attitude. And multiply, it did!

This pesky thing called life has been very hectic on all fronts. If there was an overflow:delete command, my trigger finger would have been poised over it at all times. So, to those of you who have visited my blog in the last few weeks and left comments, I offer you my most sincere apologies. I have read all your comments and I hope to catch up with you, here and on your blogs, in the weeks to come.

Since all work, dishes, laundry and no play makes Manisha a sad girl, we made a quick dash to Moab, Utah and stared in awe at glorious arches, buttes and canyons in Arches National Park, Dead Horse Point State Park and Canyonlands National Park, along with ancient petroglyphs. We almost rented a Jeep Wrangler for some off-roading and jeeping but destiny decreed otherwise. The person who rented it before us smashed it up by taking a stock vehicle on the toughest 4-wheel trail in Moab. All we would have done was Shafer Trail to see the Colorado River gooseneck through Canyonlands. It was all very well as Medha's cold gripped her left nose as well as her right nose - yes, she has several of that appendage - and she even ran a fever later that day.

This short getaway was full of fun. And even though it was too-darned-hot, I had to have lots and lots of tea. Iced tea would have been just dandy but the timing of Salubri-tea could not have been worse. It came too late! That, too, when we were huddling under blankets and putting panes back into our windows instead of at a time when sunshine was in abundant supply, in Utah! You see, no matter what, I always take my 10 year old trusted tea-ball with me whenever I am travelling. That, and my tea leaves.


This time, I even carried limes that I had on hand and some sugar. We had delicious nimboo-pani (limeade) at the end of each day in Utah. Sure beats drinking stuff out of a can or a bottle!

In India, my hair dryer was my never-fail companion. In the US, it has always been my tea-ball and tea leaves. In 1997, when we drove across the US and back, I carried tea bags. Towards the end of that trip, I found my tea-ball and it's been with me ever since. So attached am I to it, that I thought I had left it behind in Canada in July and was rather morose for days till my husband found it tucked away in the khauchi pishvi. Life was just peachy again!

Is there any must-have that you take along with you when you travel?

In other news, this weekend we are going on our annual neighborhood camping trip to listen to the elks bugle and watch their rut. It's quite an amazing experience to hear that high-pitched call emanate from a hulking bull with even larger antlers perched on his head! Elk cows and calves invariably traipse through the campgrounds and we get a real up-close and personal experience. Some elks take it a step further. Residents of Estes Park had to recently deal with an elk that decided to take on a swing, instead of another bull! Don't miss the images that go with the story.

Since we haven't seen or heard from our tent after our camping trip a year ago, we opened it up and camped in our backyard on Saturday night. Urban camping rocks, I tell you! Drink water and beer with abandon for a toilet with running water is just a few steps away. Cold? Run inside and grab a comforter and another beer, too! Just because!


That's Medha trying to be scary. And the light inside? It's what made this campout in the backyard even more über. We had long - and I mean really long - extension cords going from the patio to the tent and we had a bedside lamp in the tent. Its glow reflected off our faces while we had a blast playing rummy late into the night. And since it was a cool night with temperatures in the mid-forties, we slept in and woke up quite refreshed. So refreshed that I even thought of cooking instead of just putting things together. I had some lovely organic red chard and after that cool night, a patal bhaji was what my soul yearned for. But with such gorgeous weather, I did not want to toil over the stove so I took the easy way out and made my Quick Fix Patal Bhaji.

If you are a purist or believe that things must be cooked in a certain way only, then stop reading now! I believe that cooking is constantly evolving. There is no one way of doing things. Doing something a little differently does not make a dish less authentic. If I had all the time in the world and all the inclination, I might do things the way my grandmothers did. And if you're thinking, "But this is not how patal bhaji is made!" Well, my answer to you is: It's how I make it.

Patal Bhaji (paht-tull bhah-gee) is a Maharashtrian dish that is essentially veggies or greens in a coconut sauce. Usually there is an accompanying dal that gives the sauce some extra body. In our family, we make patal bhaji just with whole masoor (red lentils), no veggies or greens. The main seasoning is usually kala masala but since I am all out and too lazy to make my own, I grind my own masala just prior to making patal bhaji. It's a breeze and goes from stove to table in 30 minutes or thereabouts.

Patal Bhaji with Chard


  • 1 bunch chard, chopped including the stems
  • 2 tbsp oil
  • 1/4 tsp mustard seeds
  • pinch asafetida
  • 1 dried red chilli, broken into two pieces
  • 1/8 tsp turmeric powder
  • 1 cup tur dal, washed and uncooked
  • 3 cups water
  • Tamarind, the size of a dollar coin
  • 1 cup coconut milk, canned is just fine
  • 1 tbsp grated jaggery or brown sugar
  • 1 to 1.5 tbsp fresh ground masala
  • salt to taste

For the masala


  • 3 tsp coriander seeds
  • 2 tsp cumin seeds
  • 3 tsp whole black peppercorns


  1. Toast the whole spices in the oven or on a tava. Allow them to cool and crush to a fine powder in your spice grinder.
  2. Heat oil in the pan of your pressure cooker.
  3. Toss in the mustard seeds and when they crackle and splutter, add asafetida, and the dried red chilli
  4. Add the chopped chard, the washed tur dal and 3 cups of water
  5. Soften the tamarind by heating it in the microwave for about 20-30 seconds in some water. Mush it up and discard any pips and fibres. Add to your pressure cooker pan.
  6. Add fresh ground masala, jaggery and salt
  7. Pressure cook this for 4 whistles or its equivalent - as long as it takes for tur dal to cook in your pressure cooker
  8. Once the pressure cooker has cooled, open it up and add 1 cup of coconut milk and bring to a boil again.
  9. Serve this right away! It tastes great with steamed rice. Or as I found, it's like a spicy hearty soup that can eaten while engrossed in a good book!


Notes:
  • I use tamarind that is called Thai Tamarind Fruit Pulp. I find it easier to use than the dried and salted tamarind from India. I can pull out as much as I need without needing any kitchen tools and since it is already soft, it doesn't take long to extract a thick tamarind juice. Tamarind extract can be used, too, but it lends its dark color to a dish and its flavor can be overwhelming if it is not used judiciously.
  • Patal Bhaji has to be spicy for it to be good. 1.5 tbsp of the fresh ground masala was at the extreme end of the spectrum for us, especially since my dried red chillies also pack in a punch. And, 2 tsp is way too less. Even Medha said that I could add some more spice the next time! Start with 1 tbsp of the masala and add more later, if you think you would like more heat.


I am going to be busy preparing for the camping trip so I won't be able to celebrate Ganesh Chaturthi, like we did last year. I'm hoping to make some chavde and besan ladu when we return. See you all next week!

Bitter Haak My Words

Last spring was memorable for many reasons. One of my favorite persons turned 50 and we wanted to be part of the celebrations, so we flew out to Massachusetts for the party. It soon turned into a working vacation and the intense hours at work were balanced by food, fun, friends and family. We returned home a couple of weeks later, late at night, feeling very content. I turned on the lights in the yard to peek outside and everything was a lush green. I went to sleep very happy that night.

The nightmare began the next morning when I realized that we had no grass. The green that I had seen was dandelions, more dandelions and even more dandelions. Our neighbors weren't particularly thrilled either. We bought weed pullers and yanked away till we only had holes for a yard. I bore the brunt of refusing to consider townhomes when we were house-hunting but I was so done with sharing walls and second-hand smoke. After a while we gave up doing things the Boulder way and I went and bought Weed-B-Gone and started spraying every dandelion cluster I saw.

Did I mention that I hate dandelions?

Yet, a couple of months later I ate dandelion greens sautéed in olive oil with some garlic at a friend's place and really enjoyed them. Ever since then I have been looking for a recipe that would work really well with dandelion greens. I knew I had found it when I saw this. And when I found a pretty bunch of red dandelions at Wild Oats yesterday, I knew the time had come to try it out.

Since Anita is still keeping some secrets when it comes to haakh and sharing only with some others who are subsequently getting their revenge by pulling out the asparagus card, I figured I would follow Chandramukhi Ganju's recipe for munji haakh. I took some hints from Bee's method because unfortunately, Ms. Ganju forgets to tell us when to add asafetida as well as the garam masala.


Before I go any further, I must tell you a little bit more about dandelion greens. Regular dandelion greens are only slightly bitter and have a flavor rather like mulyachi bhaji made with the greens of white radish. Red dandelions? If you hate karela, you will detest red dandelion greens with a vengeance. They surpass bitter melon or bitter gourd in the bitter department.

Oh, and, I loved these dandelions.


Haak, with dandelion greens


  • 1 bunch organic dandelion greens
  • 2 tbsp mustard oil
  • a pinch hing
  • 3-4 dry red chillies, broken into two pieces each
  • 1/2 tsp Kashmiri garam masala (scroll down towards the bottom of the post)
  • 1 cup water
  • Salt to taste

  1. Wash and clean the dandelion greens
  2. Slice the leaves into thin long strips and chop the stems fine


  3. Heat mustard oil in the pressure cooker or skillet till a smoking point
  4. Add hing and red chillies
  5. Add the greens and stir well till the greens wilt a bit
  6. Add water and salt
  7. Cook in the pressure cooker under pressure for at least 7-8 minutes or in your skillet until the greens are tender
  8. Release the pressure as quickly as possible, keeping your safety in mind, and open the pressure cooker.
  9. Add Kashmiri garam masala and mix well.
  10. Cook for another minute or so and serve hot with naan or, to appease Anita, have it with starchy short-grained rice.


What can I say? It was bitter personified but I loved it. Medha wanted it off her plate as soon as possible but she did taste it. My husband and I relished it over the next few days.

There is a side effect that we weren't quite aware of the first night we ate these: dandelion greens clean out your system better than spinach. Uh huh!

More about dandelions and dandelion greens:
Why we should like dandelions
Healing properties of Dandelion Greens
Growing and harvesting dandelion greens

Black Pearls

Late last night I read Indira's post on Bloggers and Beans and it brought to mind a very special friendship that developed because of my lemon pickle. We met, we shopped together, we cooked together and we have a very wonderful relationship that we are all very comfortable with. Sometimes we don't talk or correspond for several weeks, only to pick up the phone to ask for a recipe or to ask for directions to that store that one of us mentioned fleetingly in a conversation months ago. Or to simply catch up. Sometimes we pick up things that we remember the other wanted, even when we are on a business trip thousand miles away from home. Lee brought me these wonderful black pearls from Dallas because she remembered...


Thank you, Lee!

I also have some very  vocal  friends...so how could I not post this recipe again? Just for them?

Chitkya ani Kalya Vatanyachi Bhaji

Cluster Beans with Dried Black Peas


  • Have a dear friend lug you a packet of kale vatane from a thousand miles away
  • Look at them longingly, touch them, enjoy their color and texture
  • When you have had enough of visual pleasure and gustation becomes imminent, soak 1/4 cup kale vatane overnight, in at least twice the amount of water
  • Wash the kale vatane and cook them in a pressure cooker with at least 1/2 cup water for 2-3 whistles. If you skip soaking them, you need to cook them in the pressure cooker for at least 8-10 whistles. I recommend the former as you will be doing your bit for our overheated planet
  • Make Chitkyachi Bhaji, a bhaji that is always on the menu on auspicious occasions in our family, including shraddha.


How can I not send this to Nupur for her RCI - Maharashtrian Cuisine? I have to!

If you're still grumbling about recipe redux, consider this: how could a post about friends not be about nostalgia? Even Indira's recipe was revisited. So there!

Ammini's Okra Kichadi

Okra. Bhendi. Bhindi. A much loved vegetable in India but looked upon with distaste in the US. I could not get just why for the longest time. A friend, who was also at the cook together I hosted in December, had once remarked that okra was one vegetable that she detested. I remember offering her some bhendichi bhaji when she had dropped by and we were in the middle of a late dinner. She was thrilled with the roti but I could see her body stiffen and her mind freeze when she put a piece of bhendi in her mouth. She chewed on it slowly, relaxed visibly and said, "That was the best piece of okra I have ever had in my life!" She had only eaten slimy okra before.

I had no idea that what I take for granted about okra, is apparently not the norm for many of my friends. Until I came across Marc's Okra without the slime! So before we move on, here's a quick primer on selecting and preparing okra.

  1. Choose young and tender okra that are smaller in size. If in doubt, try bending the tail end of the pod. It should snap readily and cleanly. Use this to get a feel for young okra and do it quickly. Don't practice on too many okra pods otherwise you will not be welcome at the grocer's again!
  2. Wash and dry each pod completely.
  3. Use a dry cutting board and a dry knife.
  4. As the okra is chopped, you will see some mucilage collecting on the knife. Keep a paper towel handy and wipe the knife as often as possible.
  5. Cook the okra with slightly more oil than normal and on high heat. My theory is that high heat seals the outer edges preventing further oozing.
  6. Do not cover the pan while cooking as moisture undoes what you have worked hard to avoid.

Look, Ma! No slime!

Because of years of negative conditioning towards okra, I was not very keen on featuring Okra Kichadi on the menu. Then I tried it. It took bhendi to a new level. Seriously! There was no way I was not sharing it with my friends and if I could dispel some myths about the slimy okra in the bargain, I figured this would be well worth it on all fronts!

Okra Kichadi: Fried Okra in a Coconut and Mustard Sauce

From Ammini Ramachandran's Grains, Greens and Grated Coconutsicon.


Okra, the quintessential ingredient in gumbo, has a tendency to become slimy when cooked. In this mildly spiced curry, diced okra is panfried before being added to the sauce, which prevents it from turning slimy. It is spiced mainly with mustard seeds. This curry delicately balances the heat of the sambar and spicy pickles that are typically served along with it.


  • 2 cups okra, chopped along its cross-section (about 1lb whole okra yields this much)
  • 2 cups freshly grated coconut or half a packet of frozen coconut, thawed
  • 1 tbsp mustard seeds
  • 3 or 4 Thai green chillies or serrano peppers
  • 1 cup plain yogurt (I use about 2 cups homemade fat-free plain yogurt)
  • 2-3 tbsp oil (Ammini's recipe suggests 1/2 tbsp)
  • salt to taste
  • For seasoning
    • 1 tbsp oil
    • 1 tsp mustard seeds
    • 1 dried red chilli, broken into two pieces
    • 12-15 fresh curry leaves

  1. Heat 2-3 tbsp oil in a large saucepan.
  2. Add chopped okra and cook on medium-high until the okra is a slightly browned at the edges.

    Toss it about periodically so that it does not burn. Do not cover the saucepan. Typically, this takes about 10-15 minutes depending on high you are. In altitude, of course!
  3. While the okra is cooking, blend the coconut, 1 tbsp mustard seeds, Thai green chillies and yogurt into a thick purée.
  4. When the okra is done, transfer it to a bowl and set aside. Do not cover.

    For those of you who are wondering...there were 32 pods in about 1 lb of okra. Yes, I counted them. He looked at the bowl and said: That's one pound worth? Only that much? I'm hoping it's finally registered why we need more than 10.
  5. Next, prepare the tempered oil for the seasoning. Add 1 tbsp oil to the saucepan and when hot, add mustard seeds.
  6. When the mustard seeds start popping, add the dried red chilli and curry leaves. Do not allow the red chilli to burn. Turn the heat down if necessary or take the saucepan off the stove.
  7. Pour the coconut-yogurt mixture into the saucepan and cook over low heat, stirring occasionally, until the sauce simmers.
  8. Add salt
  9. Gently stir in the okra.

  10. Cover and set aside for at least 10 minutes to allow the flavors to blend.

  11. Serve immediately with hot steamed rice


The okra kichadi is a sensual mix of flavors from few ingredients. It is so delectable that it is hard to tell that the saucepan it was cooked in was ever used at all. It's literally licked clean!

Some tips:
  • Since I don't get good quality fresh coconut, I buy frozen coconut. The best I have had is the one that says "Product of Kerala". No prizes for guessing that! The last time I made this, I bought Colombian grated coconut that was naturally so sweet that it was hard to believe that no sugar was added to the product. I thaw the coconut in the refrigerator and cut the packet in half using my kitchen shears. I use one half for curries like okra kichadi and save the other half for coconut chutney or fish curry. I generally use the second half within 1 day of thawing.

  • Ammini's recipe suggests blending the coconut with green chillies and mustard first, and then stirring in the yogurt. Since my blender groans while grinding coconut with little or no water, I add yogurt while blending. I use 2 cups of yogurt because we like the sauce to be a little runny and we like to smother and drown our rice in it.
  • The okra can get slightly slimy when covered towards the end of the process. I have found that if I cook it till it is crispier and more brown, the return of the slime can be averted.
  • I like to add 1 tsp of urad dal to the tempered oil. Medha loves these crunchies in her okra kichadi.

Ammini classifies Okra Kichadi as a popular curry:
Whether it is a wedding or a religious holiday or a birthday, the recipes in this section are the standard fare at any sadya (feast).At a traditional sadya, there are no fancy table settings or beautiful vases of fresh-cut flowers, and there is no particular main course. The perfection of the dishes is more important than the presentation itself. They come just as they are, served on a large banana leaf spread on a clean floor or a simple table, with rice in the center accompanied by several vegetable dishes, both wet and dry, and several different accompaniments. And as you begin to relish the meal, so many different flavors are blended on the palate that each bite tastes different and better than the one before. Food's greatest glory is in its infinite variety of textures and flavors.


Adapted from Ammini Ramachandran's Grains, Greens and Grated Coconutsicon


Inspired: To-die-for broiled potatoes

I scream
You scream
We all scream for ice-cream

Except that all of us really prefer potatoes. No kidding! We will forego the delicious cold treat for another helping of that terrific tuber.

I have been enchanted by Gini's Oven roasted potatoes with Indian spices ever since she posted them over a year ago, with perfectly broiled lamb chops. It was only this January that I actually did something about it besides periodically going to Gini's blog to salivate over the pictures!

Broiled lamb chops and roasted potatoes soon became a mid-week favorite. Instead of indulging in some touch-and-feel-and-put-it-back-on-the-shelf therapy at Kohl's, I started going to Sam's Club to pick up a tray of delicious New Zealand lamb chops while Medha was at piano lessons. We'd hurry home and by the time she was done with her shower (read: finished all the hot water), a delicious meal would be ready for the two of us, with plenty leftover for the next day.

To die for broiled potatoes


  • 6 medium red potatoes
  • 1 dried red chilli
  • 1/4 tsp jeera
  • 1/4 tsp coriander seeds
  • 1/4 tsp fennel seeds
  • 1/4 tsp mustard seeds or 1/4 tsp nigella seeds or both
  • 2-3 tbsp olive oil
  • salt to taste

  1. Wash and scrub the potatoes well. Chop evenly into 1 inch size pieces and place in an oven-proof dish or loaf pan
  2. Coarsely pound all the spices using your mortar-pestle.

  3. Sprinkle the spices and salt over the chopped potatoes and toss till they are covered evenly.

  4. Drizzle the olive oil over the spiced potatoes and toss again.
  5. If these are being cooked as a side for broiled lamb chops, then put these in the oven with the lamb. When you turn the lamb over, toss the potatoes, too. Um...otherwise broil these and pull them out after 10 minutes or so to toss them about and return to broil till done - another 10 minutes or so. It really depends on the potatoes so you will have to wing it as far as the total time is concerned.


I served these to-die-for potatoes with lamb chops, a refreshing salad and rumali rotis that I found in the freezer section at my Indian grocer. What I loved about this meal was that it was quick, with minimal clean-up. It was also the perfect meal to satisfy those mid-week cravings and chase away the winter blues.

I'm sending this over to the ever resourceful and entertaining Vaishali as my very first entry ever in Indira's Jihva for Ingredients. The ingredient in the spotlight is Potato!

Down to Earth Cluster Beans

So he's back! Sans curtains, of course. There was no way that was happening. And I knew that when I asked but the sheer thrill of asking for them was too much to pass up on. The insane request was met with the longest and most expensive silence that made the trans-Atlantic lines sizzle. That sudden unexplained static you heard? Yup! Now you know what that was.

As I sit back and analyze the whole situation, I wonder: what happened to me? There are very few things I really want and even fewer that I really need. In fact, the pictures I post on my blog are a silent testimony to the old and tired stuff that I have. So I was rather amazed at myself when I came up with this long shopping list.

I rationalized parts of it by saying the books are really for Medha - and they are. But they are also for me. I haven't read anything half decent for years. By the end of the day, my eyes are just too tired to read small print. Audio books have helped to a certain extent but I need to get back to reading because I miss it so much. I was always found with my nose buried in a book. Then Life happened, stresses increased. I stopped reading. It's not even like I watch TV. I don't. I feel isolated and pushed into a corner, even though I read the news voraciously. I have tried to get back to reading without much success. I saw a lifeline in Medha: Easy to read books. Large print. A "together" activity. Win-win all around.

But, what about the rest of the list? Try as I could, I could not understand this need to have. Where was I going to keep all that stuff? Oh my! I desperately need to detoxify! A few years ago if anyone had told me that I would covet stackable katoris made of stainless steel, I would have laughed my head off. Of course, it is nice to ponder over all these things once you have the stuff you wanted! More than slightly upside down, dare I say. I need to get back down to earth. What better way than food. And food for the soul.

Chitkyachi bhaji


Chitkya, guar, guvar are cluster beans that are firmly ensconced in traditional Maharashtrian cooking. In our home, they were always on the menu whenever there was an auspicious occasion. My mother made these in three different ways: with bhopla, with kale vatane or by itself. The recipe remained pretty much the same. I particularly loved the version with kale vatane. It made the veggie dish even more earthy for me.

The cluster beans I got at the Indian grocery store weren't anything to shout about but, on the other hand, getting fresh produce in the kind of winter we've been experiencing is something to shout about.


Kale vatane are dried black peas that I have not seen in any regional cooking apart from Maharashtrian and Goan cuisine. (If you are familiar with this legume in other cuisines, please let me know!) One kala vatana, many kale vatane. My mother used to special order these from an old doddering fellow, who also brought us the best turmeric powder, red chilli powder, tamarind and other spices sourced from Sawantwadi to Nagpur in Maharashtra. I remember a time when we didn't see him for months and the story was that he had passed away. We mourned his loss and our loss till one day the doorbell rang and there he was, like an apparition, at the door. He had been very ill and it took him months to recover and get back to his business. We urged him to retire but he said he wasn't doing it for the money anymore. He missed the joy he brought to so many homes when they saw him with his heavy bags, filled with spices and hard-to-find grains.

What is great about these dried black peas is that they hold their own - in flavor, texture and shape - when paired with cluster beans. Good quality kale vatane were hard to find in Bombay, and they are just not available here in the US. So when I quizzed some of my more learned friends over at Another Subcontinent, I was told to try French Green Lentils or Puy Lentils. I had never heard of these nor cooked with them but I found them easily at the local Wild Oats. (Thank you, Lee!)


Puy lentils are like a chubbier green version of masoor (red lentils) and, like kale vatane but unlike masoor, they hold their shape. They also have a taste, again very different from masoor, that made them a great substitute for kale vatane. These green lentils are also used in salads. I was really quite thrilled with how delicious my chitkyachi bhaji was with these lentils.


  • 3 cups of chopped guvar
  • 1/4 cup French green lentils
  • 1/4 tsp mustard seeds
  • pinch hing
  • 1 tbsp of jaggery, shredded
  • 1/2 tsp red chilli powder (more if you want to up the heat)
  • 1/4 tsp turmeric powder
  • 3 tbsp oil for the phodni
  • 1/4 cup water
  • salt to taste


  1. Cook the 1/4 cup puy lentils, preferably in a pressure cooker. One whistle and it's ready. I let it go to 2 whistles by mistake and some of the lentils sort of got mushy. Most of them were still OK, as you can see in the pictures. If they are not cooked in a pressure cooker, it could take up to 45 minutes on the stove for the lentils to cook.
  2. Heat the oil in a kadhai or wok.
  3. Add mustard seeds and when they start popping, add hing. Add turmeric powder, red chilli powder to the oil.
  4. Then increase the heat to medium-high and add the chopped guvar and stir so that the phodni coats the vegetable completely. The beans must be topped and tailed before being chopped. 1/2inch to 3/4inch is a good length to chop these into.
  5. Add the jaggery, salt and toss.
  6. Add water, lower the heat to medium-low, cover and cook till the guvar is almost done. About 10-15 minutes.
  7. Drain the cooked puy lentils and add them to the kadhai. Add salt, mix well and cook until the beans are completely cooked. And there you have your earthy chitkyachi bhaji.
  8. Serve hot with rotis and pickle.

Cluster beans in India are smaller and less plump than the variety we get here. I also found that I did not need to string the beans. I wonder if these beans have been developed to be string-free like French beans or if the species we get in the US are naturally string-free.

Once this was sitting pretty in my belly, I was back to pondering what happened to me and where I will keep the stuff that he did deign to bring back with him...