Crawlyflower tales

A few years ago, I found myself staring at luscious cauliflowers in the produce section with wonder and it was only then that I realized that I cooked only with frozen cauliflower. I vowed to change that immediately and placed a gorgeous cauliflower head in my cart. My heart sang all the way home because I knew I would be biting into the fresh taste of that crunchy crucifer that I had been missing all this time.
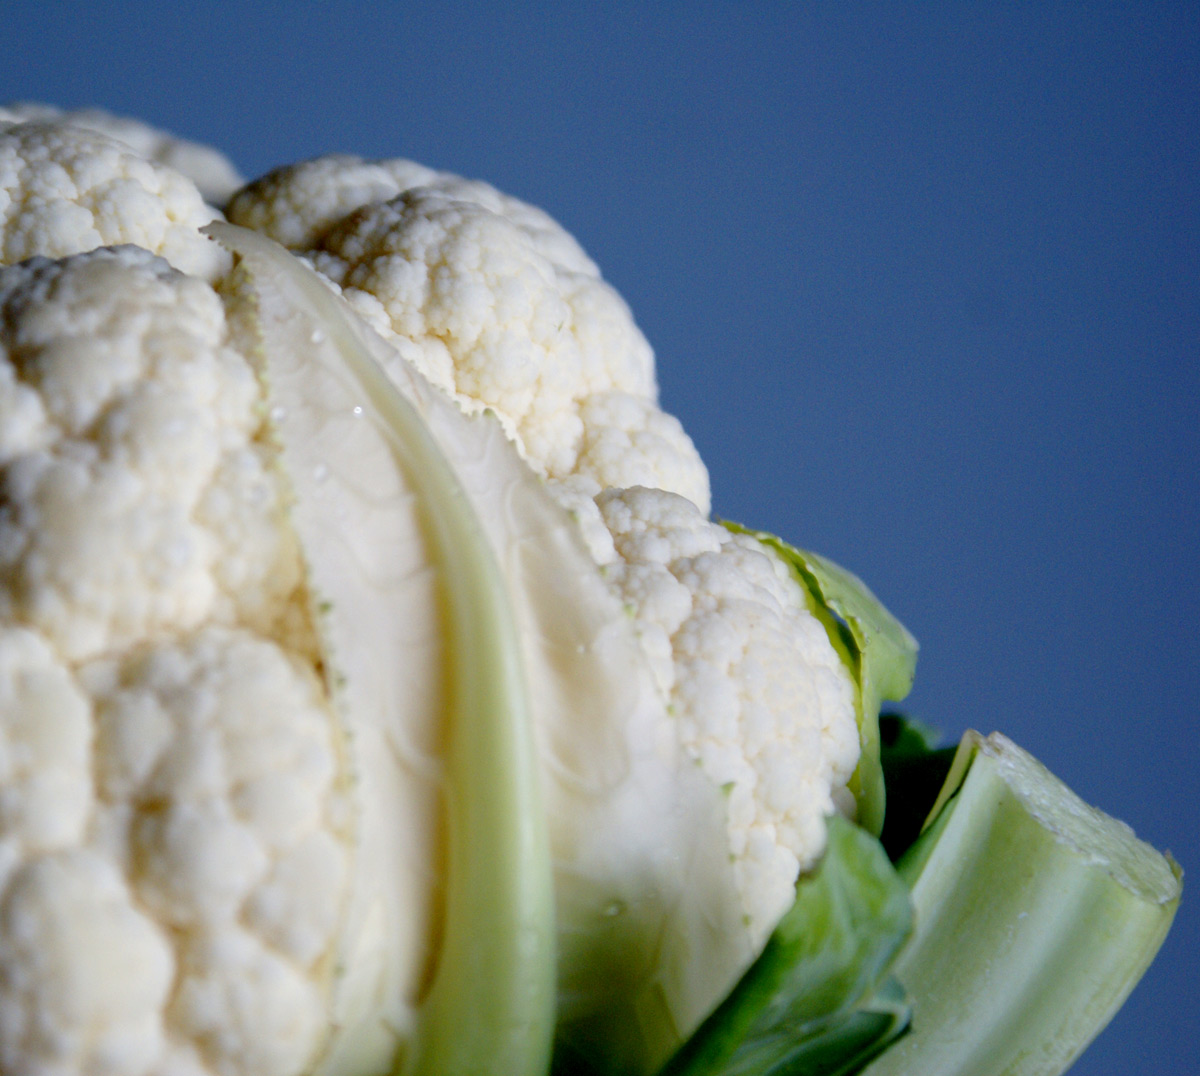
I set it up on my cutting board with great gusto and started removing all the outer leaves carefully. My father-in-law had told once me that those leaves were edible and quite nutritious but right now I was more interested in the "white curd" of the head. From the corner of my eye, I saw a very plump and very green young leaf move slightly. I turned the cauliflower to address that leaf and the other leaves that were still attached to the head in that area. I cut through the leaf only to see it start to ooze and wiggle like it was possessed.

That green leaf was a humongous green worm, fattened by all the minerals in the vegetable. My husband says I screamed the house down. I don't remember. I just remember curling up on the floor and wishing that the cauliflower and its resident would just disappear.

Needless to say, I had forgotten why I bought only frozen cauliflower. You see if there are a hundred cauliflowers in the produce bin, I pick the only one with worms in it. Such is my luck.

I went back to buying frozen cauliflower until very recently. I still don't care for worms in my produce but I have become more used to different types of worms after attempting to make a vegetable patch in my backyard this past summer. Medha is a fan of worms; she indulges in baby talk with earthworms that she holds her in her palm. She has dangled them in front of my face several times to see if my reaction changes over time; a scientific experiment, she says, to see if the data will change over a period of time. My screams are no longer as shrill as they used to be but my threats have become worse. And How to Eat Fried Worms also helped quite a bit. I sat through it without throwing up.

Cauliflower still remains one of our favorite vegetables and I am glad it does. If properly washed and cleansed of all trails that worms might have left behind, I love to eat it raw. I don't like it cooked or boiled into a soggy mess but I do love it when it's cooked well. Anita calls it al dente; I call it just right or tender but crisp.

There are so many ways in which to cook cauliflower that when my sister wouldn't stop raving about her friend Sushma's mouth-watering recipe, I just rolled my eyes. But she's not one to give up and made it for me when she visited. And I was hooked. It didn't have ginger like most aloo gobi ki subzis do, it had crushed garlic!

Cauliflower Subzi

Sushma's Aloo Gobi


  • 1 medium head cauliflower
  • 3-4 medium red potatoes
  • 2 tbsp oil
  • 2 medium cloves garlic, crushed
  • 1/2 tsp cumin seeds (optional)
  • 1 tsp cumin powder
  • 1 and 1/2 tsp coriander powder
  • 1/2 tsp red chilli powder, adjust to taste
  • 1/4 tsp turmeric powder
  • 2 tbsp tomato paste
  • 1/4 cup water
  • 1/2 tsp garam masala
  • salt to taste
  1. Cut the cauliflower into large florets, about 2 inches in size.
  2. Peel and dice the potatoes into slim chunks, about 1/4 inch by 1 inch. We will be adding the potatoes along with the cauliflower and we want them to cook without having to overcook the cauliflower.
  3. Heat oil in a large saucepan.
  4. Add crushed garlic. Before it browns, add cumin seeds, red chilli powder and turmeric powder.
  5. Take the saucepan off the stove and add cumin powder and coriander powder.
  6. Add cauliflower florets, potatoes and salt. Toss or stir well.
  7. Cover, return to stove and cook on a high flame until the cauliflower starts browning and the potatoes are cooked. Sprinkle with a little water to help the potatoes if they are taking too long to cook.
  8. Also dilute the tomato paste in 1/4 cup water, mixing it well into a thick paste.
  9. When the cauliflower is tender yet crisp and the potatoes have cooked, add the thick tomato paste and sprinkle the garam masala.
  10. Mix well in an almost folding-like action, briskly moving the cauliflower and potatoes from the bottom up.
  11. Cook for another 5 minutes, uncovered.
  12. Garnish with cilantro and serve hot with parothas or rotis and yogurt.


Notes:
  • I like to add some chopped green chillies towards the end for an added kick.
  • Any fragrant garam masala will do. If you would like to make your own, try this garam masala. Or you could use a store-bought garam masala. It's always better to make your own because you are sure you are using the choicest ingredients but not everyone has the time or the energy, in which case I think it's perfectly alright to use store-bought garam masala.


It look like it's raining cauliflower on the food blogs and that, too, without an event! I think it may have to do with it being a winter vegetable, with the growing season ending towards the end of October and even end of November in some places. Here are some of the mouth-watering recipes posted in the last couple of weeks:
Anita's Sookhi Aloo Gobhi
Ashwini's Gobi ka Kheema
Indira's Aloo Gobi with Kasuri Methi
Nupur's Spicy Cauliflower Soup


And now it's time to whoop a bit, do some virtual cartwheels and while I am at it, I might as well fly down a ski slope, too! I'm celebrating 30 consecutive days of posting, as part of NaBloPoMo. It was a lot of work and challenging at times but I did it! I did it!

I found some great local blogs, made some wonderful new friends and connected with several other bloggers. I hope to have a list of these blogs up soon!

Yay me!! And yay to all my NaBloPoMo friends and writers who wrote every day through the month of November! And yay to those to who joined in late and wrote with as much fervor!

For those of you, like Sandeepa, who want "nice" stuff to read everyday, I have some bad news. My blog will be going silent for at least a week while I try and rest those tired fingers, get some much needed sleep and catch up on my life! And you may not place bets on how long it will last! At least a week. Well, maybe a week. Or...

Four Mile Historic Park

Earlier this year, I was a chaperone for Medha's class on a field trip to the Four Mile Historic Park in Denver. It is named thus because it is four miles from downtown Denver.


Built in 1859, Four Mile House once served as a stage stop, wayside inn, and tavern for travelers on the Cherokee Trail on their way to Denver City.


We chose the pioneer sampler with the following activities: butter making, farm chores, pioneer games, prairie school and gold panning. Chaperones were assigned to each of the stations that had been set up all over the 12 acre park and my station, as you know, was the outdoor kitchen where we made sweet cream butter.

Most of the older homes had fully-equipped outdoor kitchens as the stoves were usually wood-burning stoves, making it unbearable to cook indoors in the summer heat. Quite frankly, even the outdoor kitchen was unbearable. We were there at the end of April with temperatures in the low 80s, without the stove on, and we couldn't wait to get into the shade!


There were a lot of cast-iron kitchen tools displayed in the outdoor kitchen that were probably forged on the farm itself. Like these tongs...

and this ladle...

and this gong! The kids had a great time 'calling everyone for dinner!'


This is an original butter churner that was used in those days to make butter. We were so busy in the outdoor kitchen that I did not get a chance to take a picture of the inside of the butter churner. The wooden shaft had an X-shaped stomper at the end that agitated the cream when it was moved up and down. We did not use this antique butter churner and instead made sweet cream butter in a jar.

It was a day of immense learning for all of us. Me, most of all, because I also learned that the homes that have sunk into the ground leaving only the roof are built like that by design. They aren't homes! They are root cellars!

I have vowed to go back to the Four Mile Historic Park again because I missed out on the other activities. Before leaving though, I took one last picture of an old wagon, a replica of the wagons used by the pioneers as they burnt the trail on their search for gold and riches.


Life on a farm in the early 1900s was very hard! We came away very grateful for all the amenities we have in our homes today, especially running water, electricity and heating. If you have an old working farm in your area, keep it in mind for a day trip as it is an eye-opener, both for kids as well as adults.

Other old-fashioned working farms we have visited in the past year are:
Walker Ranch, Boulder, Colorado
Ardenwood Historic Farm, Fremont, California

Have you been to a historic farm and learned something new? Do consider sharing your experience with the rest of us!

Yearning for Homemade Butter

Homemade butter was what I grew up with. My mother would skim the cream off the milk on a daily basis and collect it in a pot that contained yogurt culture. Once every 10 days or so, she would pull it out of the refrigerator and leave it out for a few hours, add some ice cold water and churn it manually with a wooden ravi or a wooden version of this. The butter soon separated and floated to the top. The rest of it was slightly tart buttermilk or taak, a welcome cooler by itself or made into mattha on hot summer days.

A hot boiled egg mashed with freshly made homemade butter and some salt was my nirvana. That was also the only way I would eat egg yolk. I called this safed loni as opposed to regular store bought butter, which was always yellow in color.

Ever wondered why store bought butter, usually made from cow's milk, is yellow? Depending on the cows' diet, the natural color of butter can range from a creamy white to a golden yellow. In order to maintain year round consistency in the final product, manufacturers add annatto which is a food coloring agent.

Homemade butter goes rancid quickly, even when refrigerated, and must be used up or cooked further to make ghee. This was the part I didn't much care for and begged my mother to do it on the day when I had to attend lectures all day and all evening.

There are days when I yearn for homemade butter. I was therefore thrilled to learn about making sweet cream butter when I accompanied Medha's class on a field trip to the Four Mile Historic Park in Denver, earlier this year. It's not quite safed loni but it's almost there.

Homemade Sweet Cream Butter

All you need is
  • Heavy Whipping Cream
  • A glass jar


  1. Pour about 1/3 cup of heavy whipping cream into the glass jar and close tightly
  2. Gather everyone in the family and take turns shaking the jar.
  3. Keep shaking it. After a few minutes of vigorous shaking, it will look like this:

    Don't be tempted, it's not done yet!
  4. It will thicken further but it's not done until you hear the buttermilk start sloshing in the jar and the whap-whap of the solid butter as it bounces off the sides. It should look like this:

    We did this in a couple of minutes in summer. In winter, it takes longer, which is why you want to take turns!
  5. Carefully drain out the buttermilk and save it to knead dough or add to curries, if you wish. If you are like us and can't wait, then go ahead and spread the fresh butter on crackers...


This is also a fun activity to do with children. They make the butter and then enjoy it right away. If you plan to bake with this butter, remember that it has more water content than store bought butter and make changes accordingly. I hope to have pictures from our field trip in my next post. Until then, check out these resources:
The History of Butter
Mattha from Cuisine Cuisine
Indira's Glorious Golden Ghee - a tutorial
Saliu's Andhra Spiced Buttermilk

Papeta par Ida

There are days that seem to never end. Today was one of those days. It become excruciatingly so when I realized that I had put it off too long and I really did need to buy Medha some new pants. She's been going around looking like a tangewali. When used to describe someone who has nothing to do with a horse, it means that their trousers or pants are too short. At least, that's how it's used in my family! While we waited for her Science Project pictures to be printed out, we went to the Kohl's next door to remedy this terrible oversight on my part. In less than a half hour, armed with several fleece pants that she needed and matching jackets that she didn't need, we joined the line at the cashier. One woman was being served, next in line was a woman and her daughter and then us. 10 minutes and our status hadn't changed. It was the same story in the other lines else I would have jockeyed to another cashier. Another 10 minutes and Medha couldn't bear it anymore.

Let's go, Mumma! I don't care if my pants are short! I have enough for this week. Maybe we can do this another time.

Ah! I have raised her well! I threw the clothes down and walked out of there, hand in hand with my daughter. Both of us feeling immensely relieved! How do they do it?! I mean on a weekday, a schoolnight? How do they shop for teeny tiny stuff that no-one needs? Stuff that will be put away in a drawer or returned? Just because it's on sale?!

We were so hungry that we stopped to eat some overly processed but delicious and juicy kosher hot dogs at Sam's, picked up our photographs and came home! What I really wanted to eat was papeta par ida - eggs over potatoes - but there was none leftover from the batch I had made on Sunday.

Papeta par ida, also pateta par ida, is a Parsi dish that is quite like a fritata - spicy potatoes that have been doused with well-beaten eggs. I've had this for breakfast, brunch and lunch at a Parsi friend's home so I am not entirely sure when this is served. We usually make a brunch out of it as it is very filling and rather satisfying! A Parsi friend of mine had once told me that my papeta par ida was as good as her mother's!

Papeta par ida

Eggs over spicy potatoes


  • 4-5 medium red potatoes, diced into 1 inch pieces
  • 2-3 tbsp oil
  • 1/2 tsp mustard seeds
  • pinch asafetida
  • 2 small Thai chillies, chopped into two pieces each OR 3-4 long finger hot chillies, chopped into 1 inch long pieces
  • 6-7 kadipatta leaves
  • 1/4 tsp turmeric powder
  • 1 tbsp grated ginger (optional)
  • salt to taste
  • 1/4 cup finely chopped cilantro
  • 3 whole eggs and 3 additional egg whites

  1. Heat the oil in a saucepan.
  2. Add mustard seeds and when they pop add asafetida, followed by the chillies, kadipatta, turmeric powder.
  3. Then add the diced potatoes and some water, if you decide to use less oil.
  4. If you are using ginger, add that too. Followed by salt.
  5. Cover and cook on a medium flame until the potatoes are done.
  6. Sprinkle the chopped cilantro all over the potatoes. Mix it in if you wish. I like to leave it on top.
  7. Add salt to the eggs and beat till they are nice and fluffy and pour into the saucepan.
  8. Cover for a few minutes to allow the top layer to cook.
  9. When the eggs have set, your papeta par ida is ready to be served!
  10. Serve with toast, plain parothas or naan.

Notes:
  • Take as many potatoes as you will need to make a nice layer of potatoes in your pan. I usually take one extra potato cos I lose about as much while they are cooking. Like so:
  • If you would rather use 6 whole eggs that really is up to you. I usually take one whole egg and one egg white per person - yes, Anita, that extra yolk goes down the drain.
  • The other famous version of this Parsi dish is bhida par ida or bhida par idu. Eggs over spicy okra which is also very addictive.


We usually cut this up into quarters, with one quarter reserved for the hungry little girl as a quick healthy after-school snack.

Squeeze an Egg

Have you squeezed an egg lately? No?! You just don't love your eggs enough, I say!

naked egg
Like your chicken? Then go ahead and bend its bones!

bendy bone
Science Fair this week.