Showing posts with label Secret Santa. Show all posts

Doing the Secret Santa Rounds

Yes! It's time for Secret Santa, already! Some of you might remember the nameplate that Medha and I made last year. And the Secret Santa game that the kids in the neighborhood play every December. We pulled names for each of our kids when we went for the gals night out at Juju Beads, in downtown Louisville. And, I pulled a boy's name.

Mumma! He's a boy!

But it's not that bad cos she tolerates older boys better than younger boys. Um, maybe that's not such a good thing! But this kid is a good kid. He even plays chess!

So two homemade gifts need to be made and delivered secretly; the final gift (under $10 or is it $15?!) to be kept under the tree on the day of the party.

What does one give a boy?! You can't give him a beaded necklace or earrings! A nameplate would just give it all away. He is Jessie's older brother. All the artsy-crafty stuff would be lost on him. Boys like food, said Medha. She remembered selling him snow cones for $1 in summer. Why don't we bake cookies? Yes! And, a perfect time to try the Stained Glass Cookies that I have been seeing in my dreams, ever since I saw Deeba's cookies on Susan's Christmas Cookies from Around the World event.

Stained Glass Cookies

Recipe from Passionate About Baking


  • 3/4 cup butter ( 1.5 sticks)
  • 1 cup sugar
  • 1 large egg
  • 2.5 cups all-purpose flour
  • 1 tsp vanilla extract
  • a pinch of salt
  • 10-12 brightly colored Jolly Ranchers or Lifesavers or any other hard candy, crushed.


  1. Ensure all ingredients are at room temperature. If it's winter and you have your heat set to 69F, then - like Medha - you, too, might wonder what room temperature means!
  2. Cream the butter and sugar together until it is smooth.
  3. Add the salt and vanilla extract and beat till mixed.
  4. Add the egg and beat till well mixed.
  5. Mix in the flour to form a firm dough. If you are doing this part by hand, then gather it together firmly and knead it a little bit to bring it together. Otherwise, it will fall apart and it will be difficult to roll it out later.
  6. Press the dough into a rectangular shape, wrap it in plastic wrap and chill it for at least 10 minutes or so.
  7. Preheat your oven to 350F.
  8. While the oven is pre-heating and the cookie dough is a-chillin', separate the Jolly Ranchers according to colors and put them in baggies. Crush them using your mortar-pestle. Or just hammer them with whatever works for you. A mallet, maybe?
  9. Line your cookie trays with parchment paper.
  10. Cut the dough into thirds and roll it out to about a quarter inch thickness. I had to knead my dough a little bit to make it easier to work with.
  11. Cut with your favorite cookie cutters.
  12. Cut out smaller shapes, but not too small, like triangles or circles or hearts from each cookie.
  13. Transfer the cookie to your baking tray and fill each cookie with different colored crushed candy.
  14. Bake for 10 minutes. Pull out the tray if you see them getting too brown. It's way cool to see the melted candy bubble away in the oven!
  15. Remove the tray from the oven and let the cookies cool on the tray for a couple of minutes. If you see gaps in the melted candy, use a toothpick to spread it before it cools and hardens again.
  16. Transfer the cookies along with the parchment paper to a wire cooling rack. Peel off the parchment paper only when completely cooled.
  17. This recipe makes approximately 4 dozen 3" cookies. Less if you use an assortment of shapes and sizes.


The cookies were delivered on Monday right after school in an unassuming brown paper bag, with a thoughtful note explaining that these were basic sugar cookies with melted Jolly Ranchers. There were no escapades like those from last year or the previous year. And I am very relieved because we had a storm over the weekend that dropped about 4-5 inches of snow and the sidewalks were icy from the thaw and freeze.

Notes:
  • We didn't know how much candy we could use to fill up each cookie. The first time the girls did it, they used very little candy. Part of the problem was also that the cut-outs were rather small making it difficult to fill. So no amount of spreading with a toothpick would help. In the next batch, we stayed with the star shape and heaped the candy. You don't want to do that as the candy bubbles over onto the cookie itself. Tastes just as good but doesn't look quite as pretty.

    Fill each cookie till the crushed candy is about level with or just less than the thickness of the cookie. More like so:

  • These cookies can be used to decorate your tree, too! If you want do that, make a small hole at the top with a straw. I don't particularly like to adorn my tree with edible stuff so we passed on this.

The party is next week and we are the hosts this year. The kids usually make gingerbread houses or forts. Some come up with outlandish designs. Medha has never been able to erect walls that stand up for more than 2 minutes. So she has a pile of graham crackers, lots of frosting and decorations. Some of the children eat their gingerbread houses. Most of it is destined for the trashcan. I wish I could say I like this part of the event but the truth is that I don't. It's the only part I have an issue with.

Medha is playing a variation of this at school, too. Secret Snowpeople, they are called. They have to bring in something special for their Snowperson. It could be a cinquain or a couplet that they wrote specially for their Snowperson. It could be a snack or a craft. They will do this for 3 days and the final gift, which will be shared on the day of the Holiday party, has to be under $5. I guess I will be baking a lot this weekend!

My post on Secret Santa last year led to a fair amount of discussion about secularism in schools. Last year I said:
If the schools acknowledge that religion exists, our children will grow up to be more accepting of others' beliefs.
And,
I am not saying that the onus of teaching religion should rest with the schools. What would help a great deal is acknowledging that there are several paths to God and maybe not, for those who don't believe in God.

I am really happy about some of the changes I have seen that I believe will lead to more acceptance and tolerance of cultural and religious diversity. In the past several months, Medha has come home with books from the library about Diwali, Eid, Hannukah and Kwanzaa. They get Time for Kids in school and one of the issues focused on India and its heritage. The Kindergarten teachers in her school are putting together a talk about different cultures and traditions. I might be asked to talk about Diwali.


As you can see, winter has really set in this year. We have already seen about 10 inches of snow. Over the plains in Kansas, they have been dealing with ice. I think we all need a Secret Santa to bring us some warmth!

The kids in Lesotho could certainly do with a Secret Santa who makes it possible for them to have a warm, nourishing lunch at school every day. It's been proven over and over again that food keeps the children in schools, ensuring that they get an education along with the nutrition. If you haven't already donated for Menu For Hope, please consider sharing some of the warmth in your homes with these children in Lesotho. Check out the prizes I am offering, along with Ammini Ramchandran. See what other bloggers are offering. This is an excellent cause and every $10 will buy you a raffle ticket for all these fabulous prizes.

Think about. Consider it. And, be a Secret Santa.

'Tis the Season...for Comfort Food

Christmas carols would fill the corners of my home all year long if I would allow it, and if Medha's piano teacher would allow it. I hide the Christmas CDs as soon as possible. It's bad enough that some stores like The Great Ignore were dressed for 'The Holidays' in September itself and that the only station we are allowed to tune into is Denver's KOSI 101.1 FM, which plays Christmas music all day long. The same songs over and over and over again. But no matter how much I complain, I love Christmas carols and it brings back memories of school and singing in our school's beautiful chapel.

And yes, we are not Christians but we call it Christmas. And, we have a Christmas tree. And, we put up Christmas lights and Christmas decorations.

Every year as the houses start lighting up in early December, Secret Santa comes into town. One of the Moms in the neighborhood takes the responsibility of assigning each child the task of being the Secret Santa for another child in the neighborhood. Two homemade items must be delivered secretly anytime during the week, followed by a party on the day school ends. A final gift, worth not more than $10, is given in person at the party, revealing just who the Secret Santa was! The kids have a blast trying to figure out who is who's Secret Santa. There are sure-fire giveaways: same wrapping paper or the same craft is delivered by siblings. Some kids even hang around by the door, hoping to catch their Secret Santa!


Last year Medha made penguin ornaments. I helped her draw the various parts on sticky foam; she then cut them and pasted it all together. She painted some parts and used glitter glue on others. She then slipped over to the neighbors with a black Hallowe'en mask covering her face and an extra large sweatshirt, rang their doorbell, left the gift at their door and ran in the direction opposite to that of our house. My husband was waiting for her around the corner in the car and they sped off in the wrong direction, made a full circle around the block before returning home. The car was too far away and gone by the time it could be seen! Medha stumbled back into the house, rolling with laughter at her escapade.

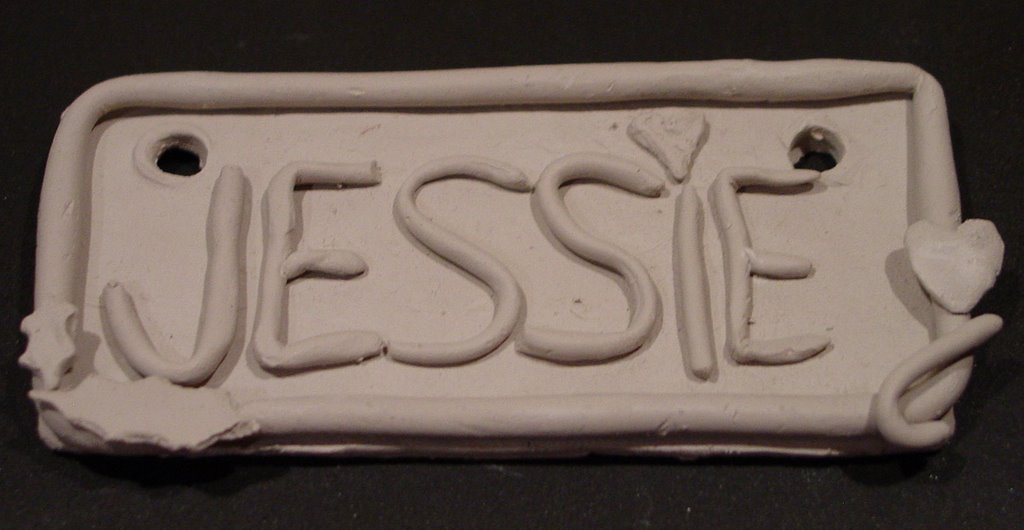
It's Secret Santa time again. We started making the first gift this evening, a nameplate wall hanging made of clay. No, neither she nor I are that creative to come up with it on our own. We did refer to Craft Fun (Art & Activities for Kids), an amazing book with over 90 projects for kids from ages 6 to 11. Medha designed the nameplate and so far, this is what we have:


It has since been taken apart carefully and each piece is now drying. Tomorrow we will paint each piece first as it is easier to paint each piece separately than to paint it as a whole. Then we will slip and score an area of each piece and pray to the Santa in the North Pole to make it stick to the plate. If they don't stick, I guess we will have to call on Super-Glue for help.

I thank God for the wonderful neighborhood we moved into a year ago. Most of the families go back at least a couple of decades. They have shared the joy of new births as well as grave illnesses where children from the affected home were taken in by several families, while others kept vigil at the hospital. It can be quite daunting to move into an extended family such as this, but they have only welcomed us with open arms. They keep the warmth alive by the things they do for one another. Especially when Old Man Winter decides to blow. But when he blows like he did last week, there is one more thing that I long for. Comfort food. From that place within me that I cannot define. My roots, perhaps.

So last week, when one of my readers left me a comment with a recipe for one such food that fits the bill perfectly - for a cold and wet evening - I decided to give in to the urge and it was by the far the quickest and the simplest dinner we have had in a long time, and also the most fulfilling.

Pithla Bhath


  • 1/2 cup besan (chickpea flour or gram flour)
  • 4 cups buttermilk
  • 3 tbsp oil
  • 1 tsp mustard seeds
  • a pinch of hing
  • 1 dried red chilli (use more if you like it hot!)
  • 1/2 tsp turmeric powder
  • 1/2 cup red onion, diced
  • frozen drumsticks (not the chicken kind! But the veggie saragawa kind), about 9-10 pieces
  • salt to taste
  • chopped cilantro for garnish
  1. Put the drumsticks in a pot with enough water so that they are covered completely. Add some salt to the water and cook on medium-high until the tender. Usually about 10-15 minutes, depending on the quality of the drumsticks. Drain when cooked.
  2. Mix besan with buttermilk to make a paste that is the consistency of pancake batter. Use your hands to mix it as that is the best way to ensure that there are no lumps.
  3. Add turmeric powder to this paste
  4. Heat the oil in a saucepan
  5. Add mustard seeds and when they start popping, add hing
  6. Break the red chilli into two pieces, shake out as many seeds as you can and discard them, and then add the red chilli pieces to the oil, taking care that neither the mustard seeds nor the red chilli burns. If the oil gets too hot, simply turn off the flame and move the pan off the stove.
  7. Add chopped onions to the oil and sautée until they are pink in color. About 5 minutes, if you have done a good job chopping it fine!
  8. Turn the heat down and slowly add the besan-buttermilk paste to the pan. It tends to splatter at this point so be careful.
  9. Add the cooked drumsticks and salt to taste
  10. Cook on medium-low heat for 10-15 minutes, stirring every so often, until the mixture thickens into a yummilicious pithla. The consistency is very similar to that of thick slip that you would use to glue clay together. (Perhaps I am not helping much with that analogy but the common thread here is clay!)
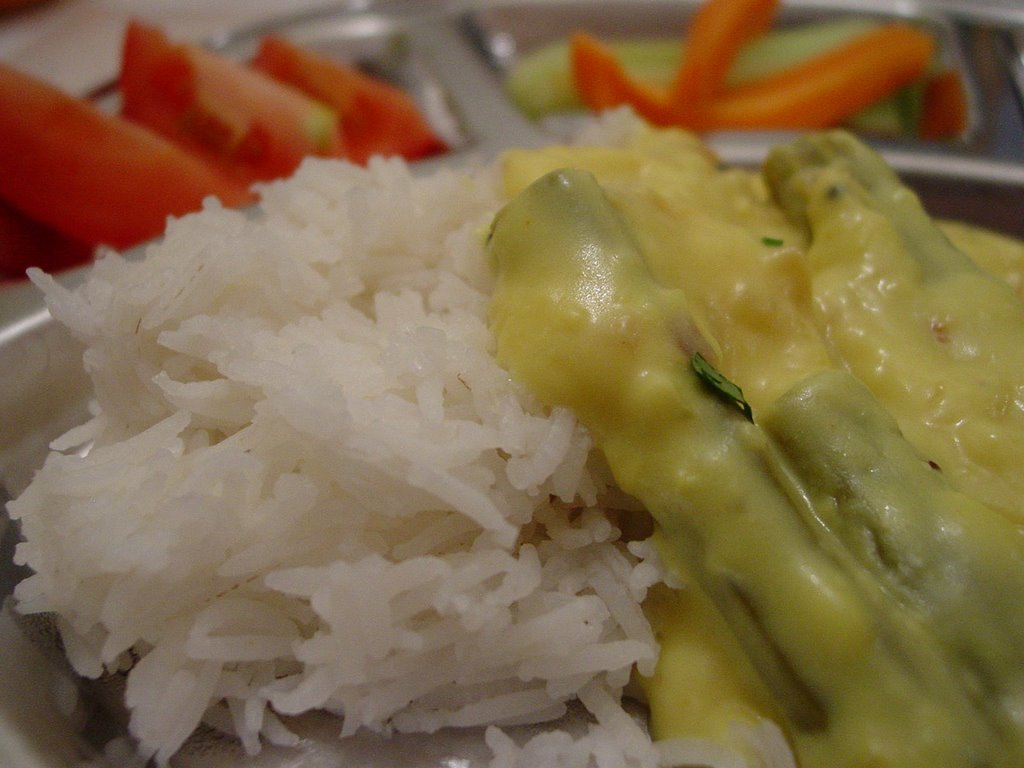
  11. Garnish with chopped cilantro and serve over hot steamed rice (bhath) and enjoy to your heart's content.

There are several variations of Pithla. Many of which are mentioned in the comment that led to this meal.

Nupur of One Hot Stove has her own take on pithla. And, there are more recipes on Mumbai-Masala's Maharashtrian food.

And then there is the drier version of pithla: zunka, which Ashwini made me drool over recently.

Pithla is just so quintessentially Maharashtrian and earthy that it brings to mind the smell that goes with cooking on a coal stove in the ground.


Some tips:
  1. If you don't have buttermilk on hand, whip some yogurt and add water to make a buttermilk substitute
  2. Save the water that the drumsticks cooked in. If your pithla thickens too much, you can add this water slowly to the pan, stirring it in as you add it
  3. An important point to note is that a little bit of besan goes a long way in this dish. I used 1/2 cup of besan and made enough to feed the three of us. We could have fed a couple more but since everyone was over-eating that night, there were no leftovers. So don't go overboard with the quantity of besan. You might be eating it for days!


Wish us luck with the nameplate. I'll post an update with a picture of what it looks like once we are done with it. And, Shhh! Don't tell Jessie!

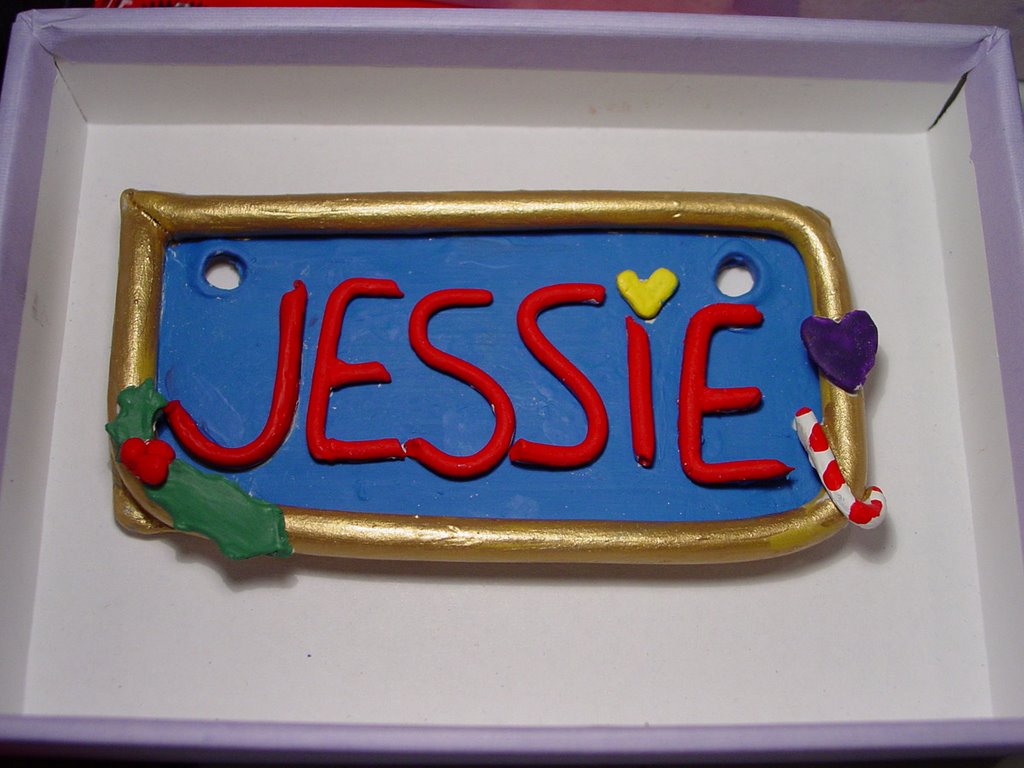
Update: We finished and delivered the nameplate late Tuesday evening. separating all the individual elements seemed like a good idea at the time, it really was not because they warped as they dried. So we had to remake most of them and speed-dry them with a hair-dryer. It was easier for Medha to paint them though. Putting it back together and then touching it up was not easy! But we did a rather decent job, I think!

Here's another picture just before it was wrapped in bubble-wrap and delivered in heavy disguise.

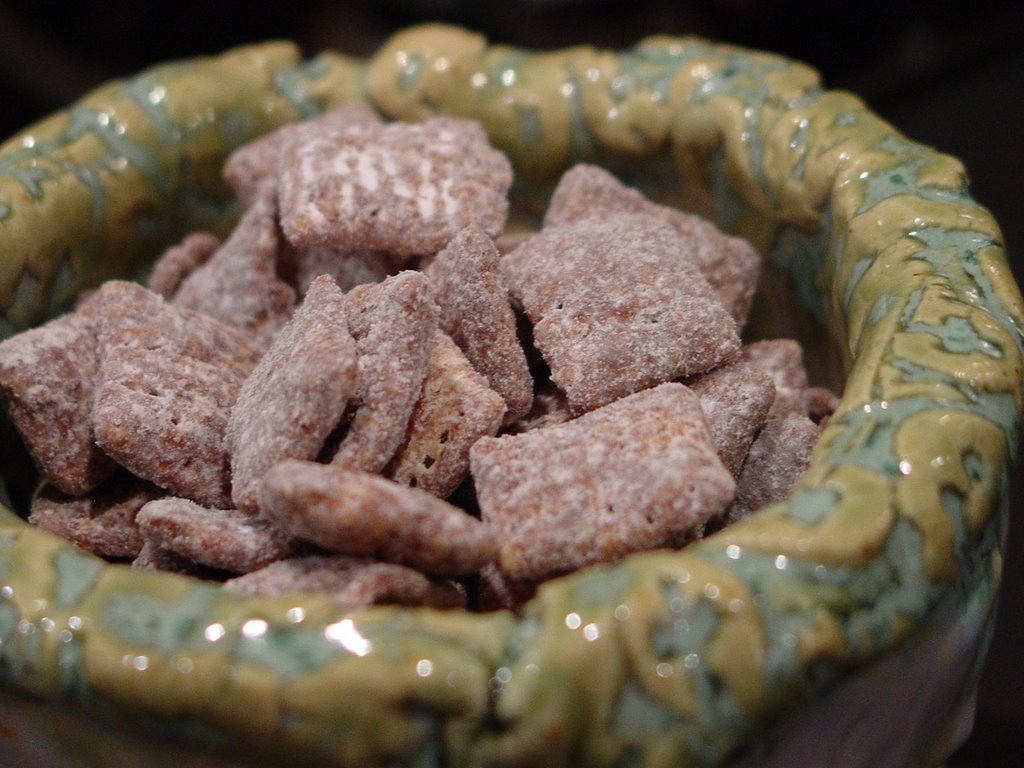
Medha got her first delivery, too. The door almost came down in her effort to catch her Secret Santa in the act but she failed. She got some really delicious Puppy Chow that I can't stop reaching out for!

Medha made the bowl it's in!

Have a wonderful Holiday season! And if you have kids in the neighborhood, it's still not too late to start playing Secret Santa!