In The Kitchen With Anita & Kumari
Posted by Indian Food Rocks at 3/30/2011 06:33:00 PM 25 comments
Labels:
In The Kitchen With,
India,
Indian Bread,
ITKW
Thepla for the Soul

Oooh! Did you make those again? Is that what we're having for dinner?
Sorry, kiddo! I am just digging into my archives. [pout]Another day, maybe? When I get fresh methi or I remember to grow my own, like Shyam does?
You promise? But of course!
She went away rather morose, knowing that she would get a third instalment of rotisserie chicken makeovers for dinner. I thought of making dal with unripe mangoes just for her but slaving over a warm stove, no matter how inviting, was not something I wanted to do with an achy back. I helped pack-up the Book Fair at her school yesterday and I knew I should not have helped lift those heavy boxes or move chairs but what is done is done.
Thepla is a spiced unleavened flatbread from my husband's home state of Gujarat. Although I'll have you know that I knew how to make this much before we knew each other. There are as many variations to methi na thepla as there are to batata vadas, all of them without onions and peas. I know not where my version hails from but I learned it by watching a Maharaj at work.

Methi na Thepla
- 1 cup whole wheat flour
- 1/3 cup besan
- 1 bunch methi
- 1/2 bunch cilantro (optional)
- 2-3 tbsp oil
- 1/4 tsp mustard seeds
- pinch asafetida
- 1/4 tsp turmeric powder
- 1/2 tsp red chilli powder (optional)
- 3-4 Thai chillies (more, if you want to up the heat), sliced thin
- 4-5 kadipatta leaves (optional)
- 1 tsp grated ginger
- 1 cup yogurt, whisked (approx)
- Salt to taste
- Wash methi and use only the leaves, discarding the stems. Pat dry and then chop fine.
- Wash the cilantro and chop fine.
- Mix the two flours and salt in a bowl.
- Heat the oil in a small saucepan and add mustard seeds. When they splutter, add asafetida, followed by green chillies and then kadipatta. Keep a splatter guard handy to keep the mess at a minimum.
- Make a 'well' or a depression in the flours and put the chopped methi leaves and chopped cilantro leaves into it.
- Add grated ginger, turmeric powder, and red chilli powder.
- Pour the hot oil over the leaves. You will hear them sizzle!
- When the oil cools enough to handle, pick out the kadipatta leaves and if you wish, the green chillies, too. Gently rub the leaves and seasoned oil into the flour.
- Knead a firm dough using only as much yogurt as required to bind the dough. You do not want the dough to be too soft or sticky.

- Let the dough rest for at least 15-20 minutes. Cover with a damp paper towel or kitchen towel.
- Heat a tava in the meanwhile.
- Divide the dough into small balls, about 12-13 and roll them out till they are at least 6 inches in diameter.

- They must be translucent.

- Put the rolled out thepla onto the hot griddle. When its color has changed slightly or it developed little brown spots, flip it over.
- Drizzle a little oil over the surface and spread it. Let the thepla cook some more and then flip it over again and drizzle some oil onto this side and spread it.
- If you have the paratha-pressing contraption, press down on the thepla and rotate the thepla. Do this until both sides have cooked and have some pretty golden spots.

- Serve hot or at room temperature with chundo or with yogurt mixed with jiralu.

Notes:
- I use a little more besan than what is specified in most recipes. We like the taste of besan and I remember seeing the Maharaj add a fairly large amount of besan in proportion to the whole wheat flour.
- Most thepla recipes do not use seasoned oil and I have found that this ups the taste-level significantly.
- Theplas need to be rolled out thin. If they are not transclucent, then you are making methi parathas, not theplas.
- Theplas need a large amount of oil and must be cooked using oil or ghee. They are usually stored at room temperature and are perfect finger food in lunch boxes as well as for picnics. You could use less oil but then you might end up with chewy or extra crisp theplas depending on how long you cook them.
- They are said to last at least 4-5 days in an air-tight container. Ours never last more than the next day.

Thepla recipes abound on the net:
About.com
Smita Serves You Right
CuisineCuisine.com
Madhuram's Eggless Cooking
Monsoon Spice
Posted by Indian Food Rocks at 10/09/2008 11:25:00 PM 37 comments
Labels:
Gujarat,
Gujarati,
Indian Bread,
NaBloWriMo,
Thepla
Bitter sweet memories

Her reverie was broken by her daughter's impatient voice:
Mom! Mom! Do you want to talk to him? Well?
She did. And she knew exactly what the conversation would be.
"I'll be home in half an hour or so," he said.
"Hmmm!"
"What have you made for lunch?"
"Oh, just shrikhand-puri!", she said in repartee.
And they both laughed, like they did every day of the working week. This was a standard joke between them; one at which her daughters rolled their eyes, also every day.
Shrikhand-puri is both festive and rich. Shrikhand involves at least 6 hours of prep time and deep fried puris were an occasional indulgence. It isn't daily fare for lunch, and certainly not on a weekday.
"I am feeling quite tired."
"It's one of your favorite things. It will make you feel better. Some tea, too."
"I'll see you soon. I can't wait to come home."
She went back into the kitchen and told her house-girl, Flora, that she needed help getting lunch ready as bwana would be home soon. Flora was used to making phulkis and had also been trained to make parothas.
"It's no different!" she asserted and proceeded to roll one out for Flora to see.
"Mama! Ndiyo, ni rahisi sana!" (Yes, madam, it is easy)

She showed her how to cook them gently on the tava, without any ghee as the stuffing already had more than she would use normally.

She called out to her daughters to lay the table but the music blaring from their room drowned her voice. She was about to do it herself when the phone rang again.
He wasn't coming home. Ever.
We didn't eat that day. At least I don't remember doing so. And, she never made sanzoris again.
Sanzori
For the stuffing:- 2 tbsp ghee or clarified butter
- 1 cup whole wheat rava or cream of wheat or farina
- 3/4 cup sugar, more if you like it sweeter
- 1 cup water, warm
- 8-10 green cardamoms
- a few strands of saffron (optional)
- 1.5 cups all-purpose flour
- 1 tbsp oil
- half cup water to bind the dough
- Add oil to the flour and knead it with water, adding as much as needed to make a soft pliable dough that is not sticky.
- Cover with a damp towel and allow it to rest while you get the stuffing together.
- Heat the ghee in a kadhai and when melted, add the farina and roast well, stirring constantly, for about 5-6 minutes. Ensure that the farina does not burn or turn dark brown in color.
- Add sugar and mix well.
- Add warm water and stir until it is completely absorbed.
- Cook on low until it comes together well. This is very like sheera without milk and dried fruits.
- Take it off the stove and allow it to cool.
- Shell the cardamoms and pound the seeds into a coarse powder and mix into the stuffing.
- If you decide to use saffron, warm about 1-2tsp of milk and add the saffron strands to it. Rub the saffron gently into the milk so that the milk absorbs its flavors. The color is not really of importance here. Add this to the stuffing and mix well.
- Divide the stuffing into 14-15 parts and roll into small balls.
- Heat a tava or griddle.
- Divide the dough into as many small balls as you have balls of stuffing.
- Roll out, stuff and cook each sanzori, following the instructions for parotha.
- There is no need to add ghee while cooking the sanzori as the stuffing oozes ghee as it cooks.
- Fold over the sanzori about three-quarters of the way from the top and then fold it over on itself in half. Quite like chavde.
I made sanzoris for Ganesh Chaturthi as Medha had never eaten these before. She did not take to them as much as I had thought she would. But as the pile of sanzoris thinned out, she wanted more. Now she wants to know when I will make them again.

I will. Soon. Because the pain has been replaced by memories - happy ones.
Posted by Indian Food Rocks at 10/03/2008 04:37:00 PM 24 comments
Labels:
Ganesh Chaturthi,
Indian Bread,
Memories,
NaBloWriMo
Parotha, The Making of
Batatyacha parotha, or aloo paratha, is one of our favorite parothas.
We're generally not very fussy about our meals. Breakfast served for dinner is just fine and leftovers from dinner for breakfast rock. So, batatyache parothe could very well be either breakfast or dinner. 1 cup of atta, 1 tsp of oil and a pinch of salt, kneaded into a medium-soft dough makes about 13-14 parothe. I knead the dough, cover it with a damp paper towel and let it rest while I get the stuffing ready. For the stuffing, I use about 5-6 medium boiled potatoes, mashed with a small clove of garlic, 1 tsp of red chilli powder, 1/8 tsp of turmeric powder and salt. I make this without garlic, too.


Place it with the pleats facing up on the tava, to begin with, on a medium-high flame until it gets a few brown spots on the underside and starts puffing up a teeny bit. The latter depends entirely on how you roll it out so if it does not happen, don't fret.

Turn it over and cook the thicker side till it, too, has some brown spots. Take some ghee (5 drops or so) or melted butter and spread it quickly using a spoon on the parotha. Flip it over and do the same to the other side. Cook both sides for about a minute or so each...
...till you get this and serve immediately with chutney or pickle and raita.
This parotha is different from the aloo paratha found in Indian restaurants; it's rather delicate and much smaller in size.Shivapriya has a fabulous tutorial on aloo parathas with much better pictures.
Luv2Cook has another version with tips on freezing parathas
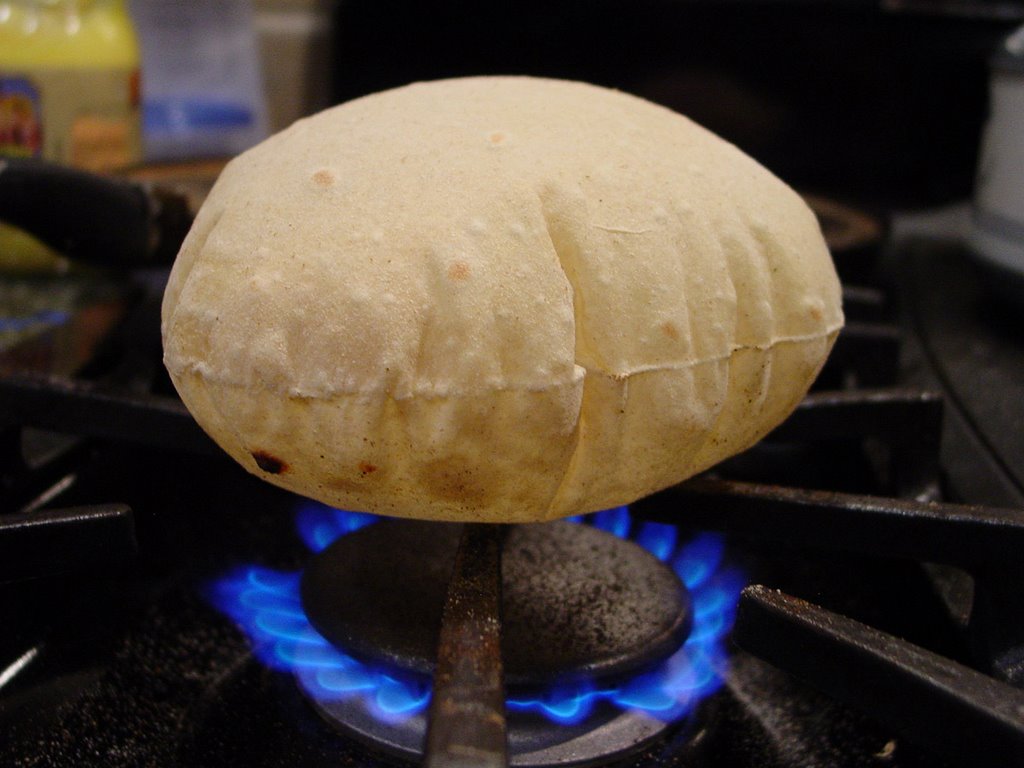
I'm All Puffed Up
I made roti or phulki after a very long time. I was really thrilled with this picture so I thought I'd share!
Do you have any great roti pictures? Post away, if you do!
Updated: I also have another picture of a roti here. It tied for the best photo award in the Food Photo category of the South Asian Photo Contest.